• Skip to primary navigation
  • Skip to main content
  • Skip to footer

Gugu Guru simplifies collaborations with mom creators.

Teaching brands how to build mom creator communities.

  • For Brands
  • For Creators

DIY

DIY Crinkle Toy

by Gugu Guru 3 Comments

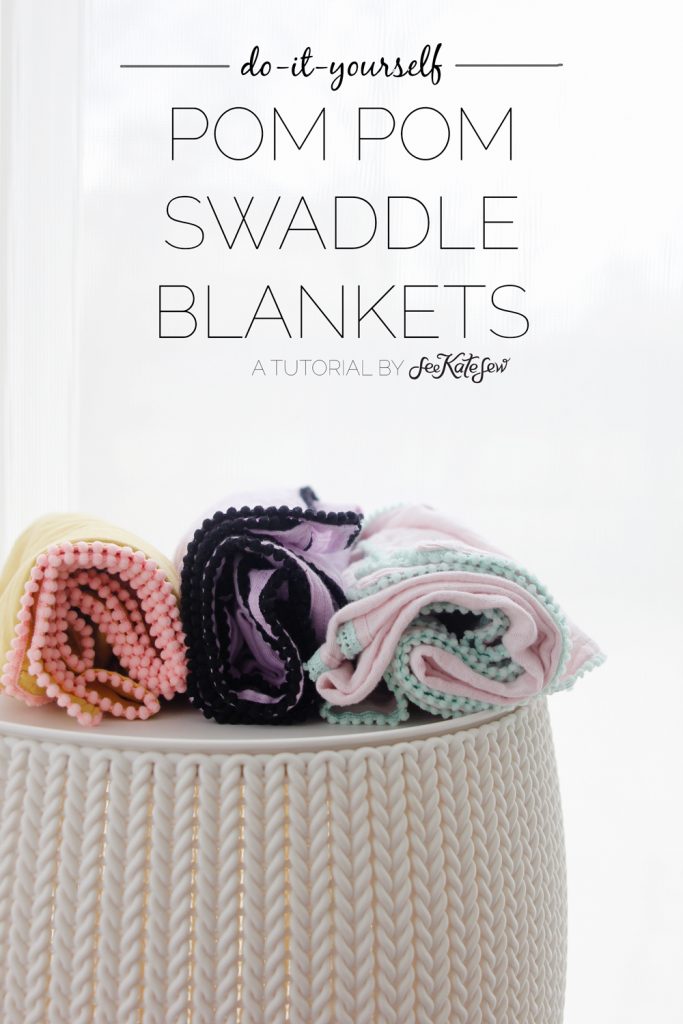
See Kate Sew partners with Gugu Guru again to share a fantastic DIY tutorial.  This time? A DIY crinkle toy to match up with her TWELVElittle diaper bag. Read on to get the details…

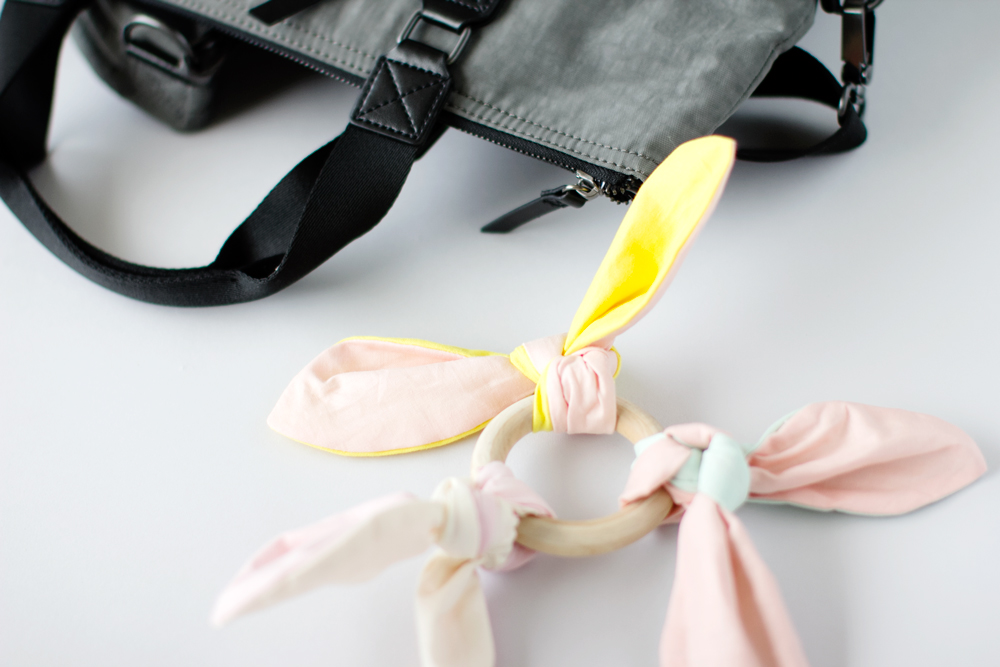
I’m thrilled about this post, I love the project and I love the bag that goes with it! Today’s DIY project is a Knotted Crinkle Toy for baby! It’s a fun, sensory toy with a wooden ring. Lots of things for baby to touch and hear. This is a type of sewing I’ve never done before (with crinkle material!) but it was super easy and fun! Even if you’re new to sewing, you’ll be able to tackle this project.

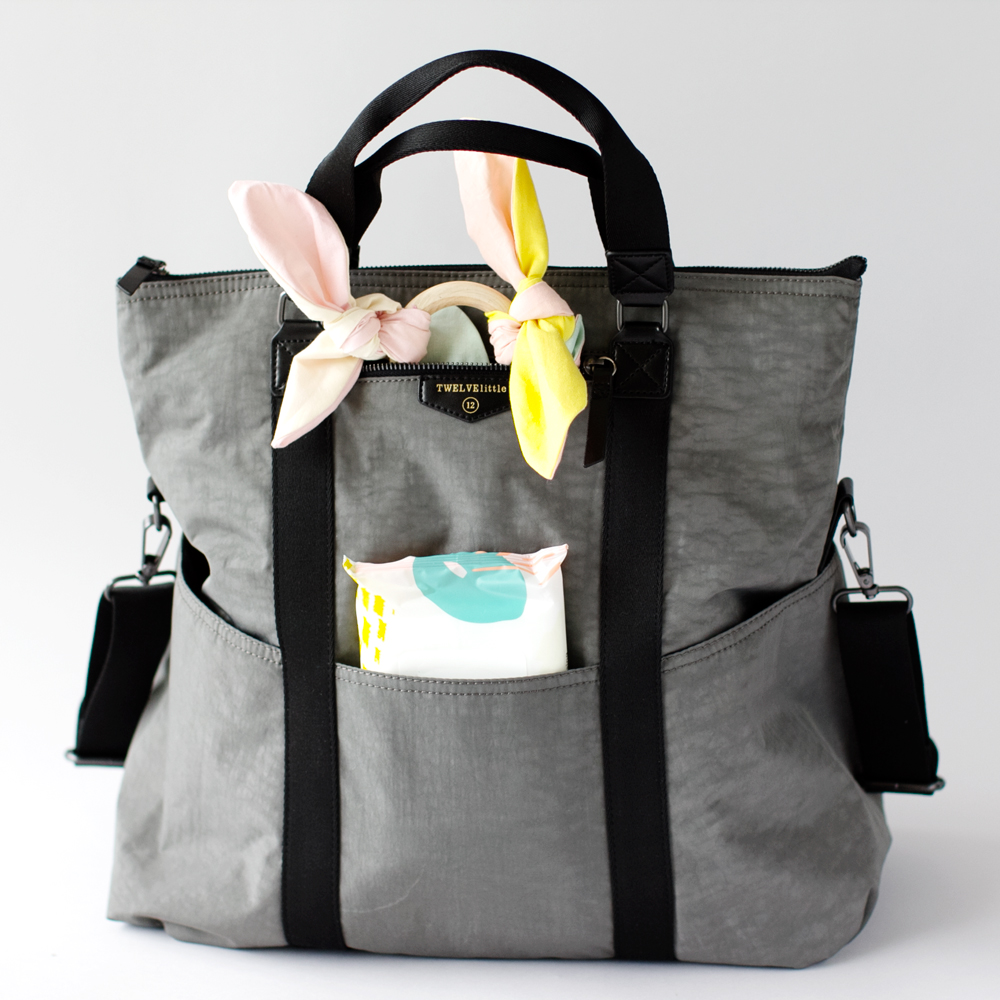
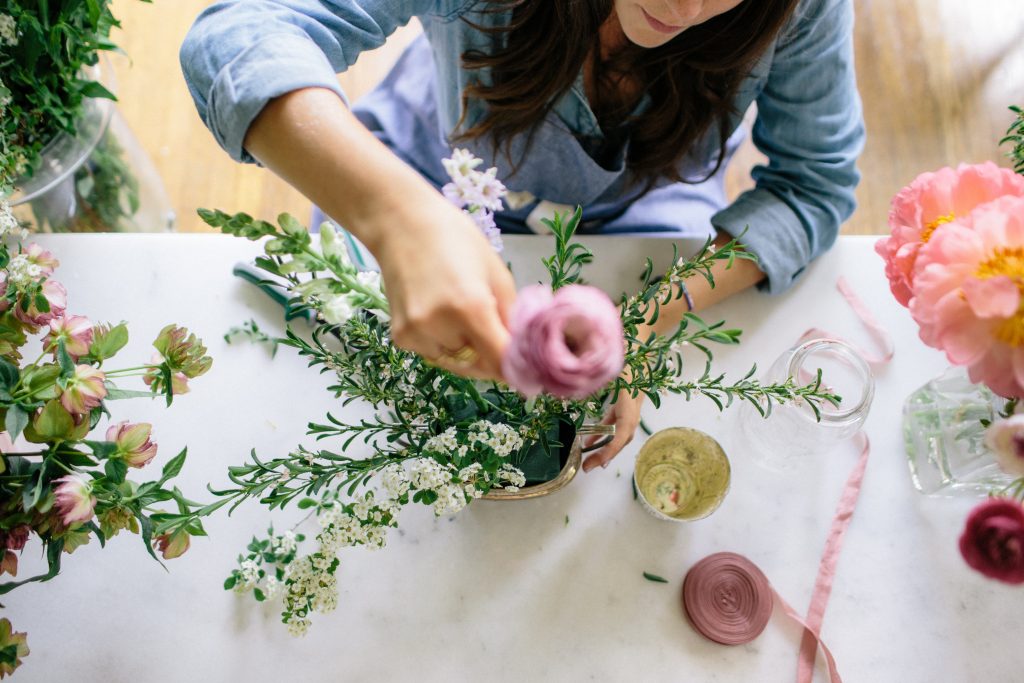
TWELVElittle is a modern diaper bag company, but you might not even know it by looking at their bags. I fell in love with this 3-in-1 Foldover Tote. Having a big diaper bag has been so nice! One baby alone is a good enough reason to have a diaper bag that can hold a whole bunch, but since I have 2 other kids, too, the space is extra useful.

diy-crinkle-toy

A few other things I love about this bag:

  • The color is so nice and dimensional, plus the fabric is wipeable and just nice!
  • It can be a tote, backpack or sling bag, depending on how you clip the strap! A hands-free option is a must with kids!
  • The color and style won’t be embarrassing for my husband, he carries the diaper bag often, and he likes it, too.
  • The interior is wipeable and has lots of pockets and they’re big – for bottles, sippys, diapers, wipes, etc. Plus a few zippered pockets (on the inside and out) for my stuff.
  • The style is classy enough for date night!

I couldn’t quite decide which pocket was best for my wooden ring crinkle toy, but let’s make one anyways!

diy-knotted-baby-toy

DIY Baby Crinkle Toy

Materials:
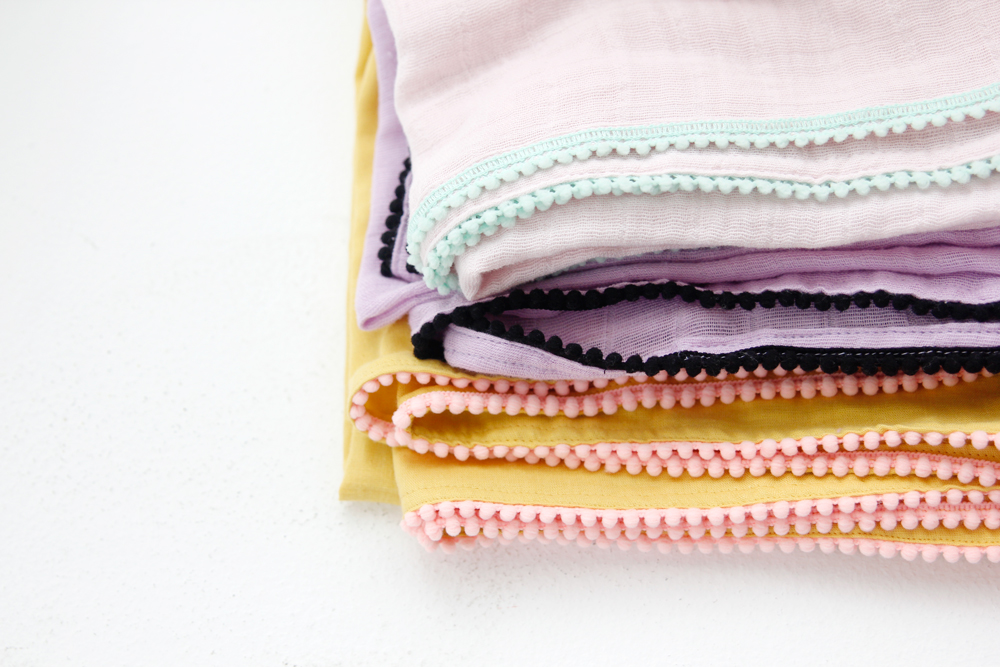
-6 Fat Quarters of solid colored fabric (I’m using Cotton + Steel solids)
-1/2 yard crinkle material* OR an old, clean chip bag
-3″ unfinished wooden ring
-Free Pattern Download

crinkle-toy-materials

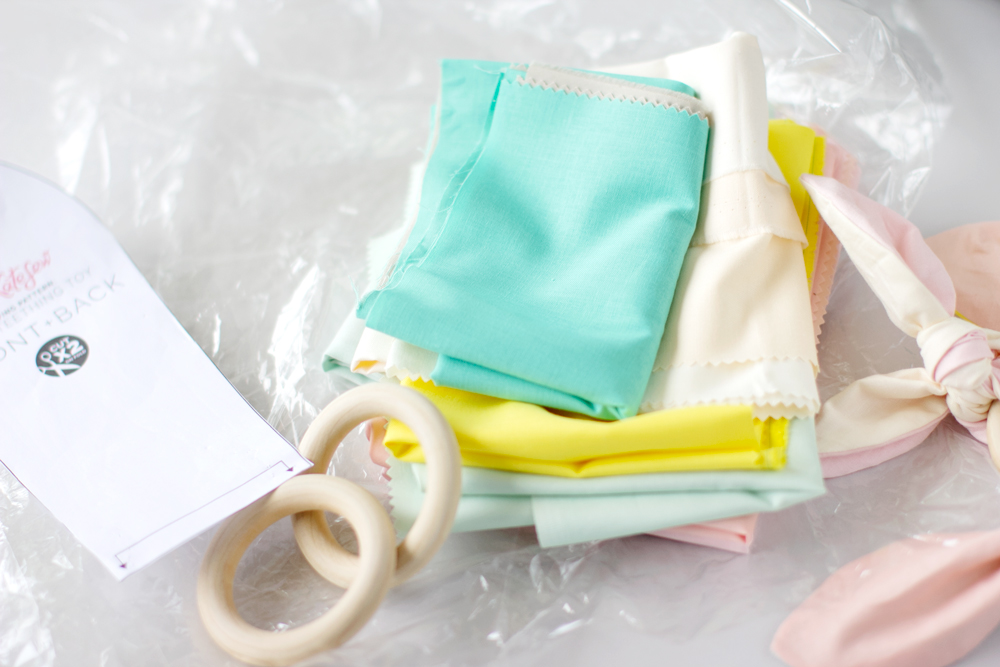
*I used a clear CPSIA and EN71 compliant crinkle material which you can find with a quick google search. A chip or similar food product bag will give you a similar sound, so it’s up to you what you want to use.

Instructions:

Use the pattern piece to cut SIX layers of fabric. Align the Fold Arrow on a fold of the fabric and cut out with fabric scissors. Use the same pattern piece to cut THREE layers of crinkle material.

tutorial-1-crinkle-toy

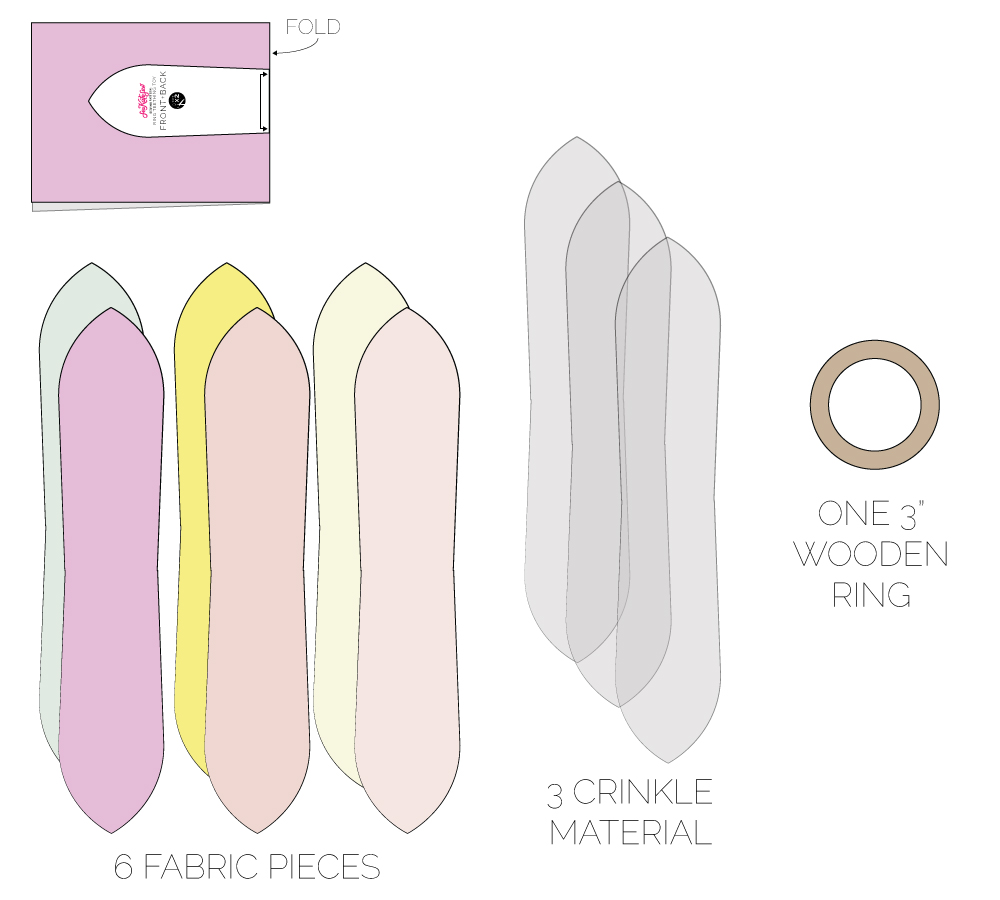
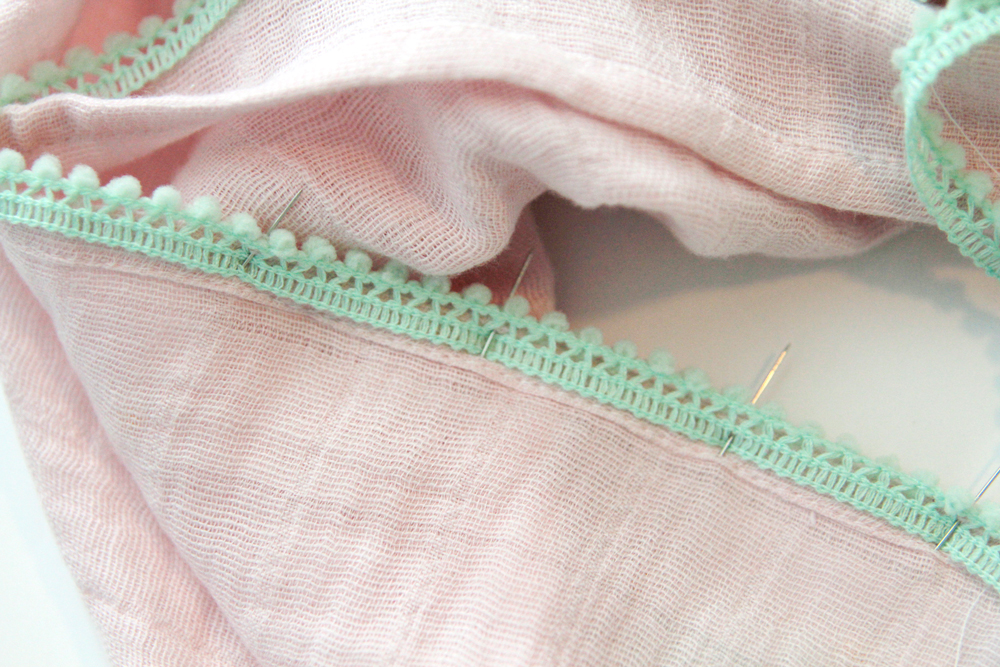
Decide which colors/patterns you want to pair together and stack them up. You’ll put the two fabric layers together with the right sides of the fabric together. Then pin the crinkle material to the backside of one fabric.

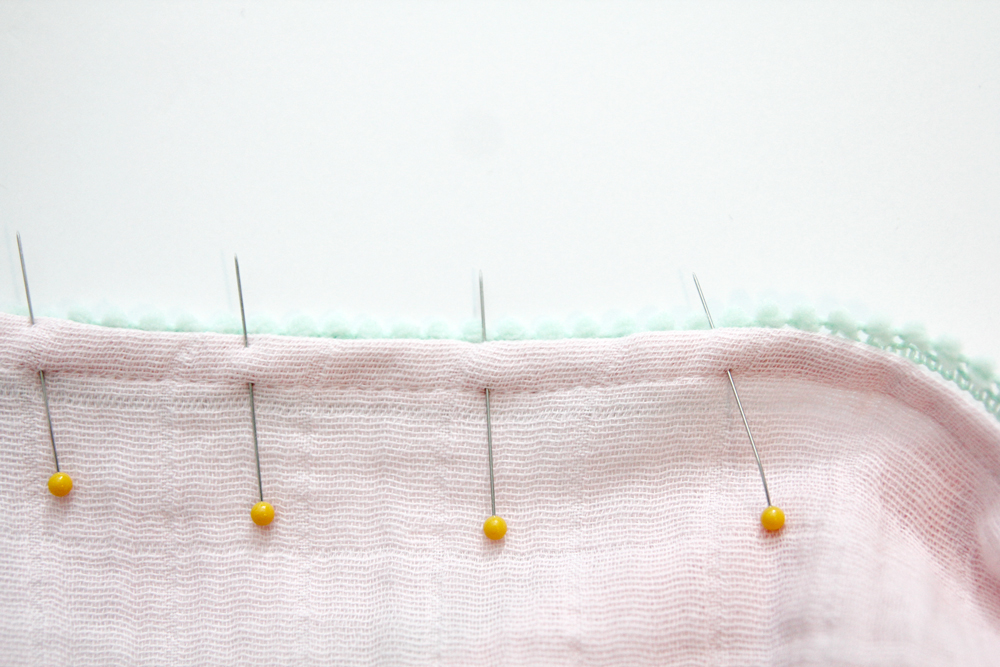
Sew around the edges of the stack, 1/4″ from the edge of the fabric. Leave a 1-2″ opening on one side, right in the middle of the toy.

baby-crinkle-toy-tutorial-3

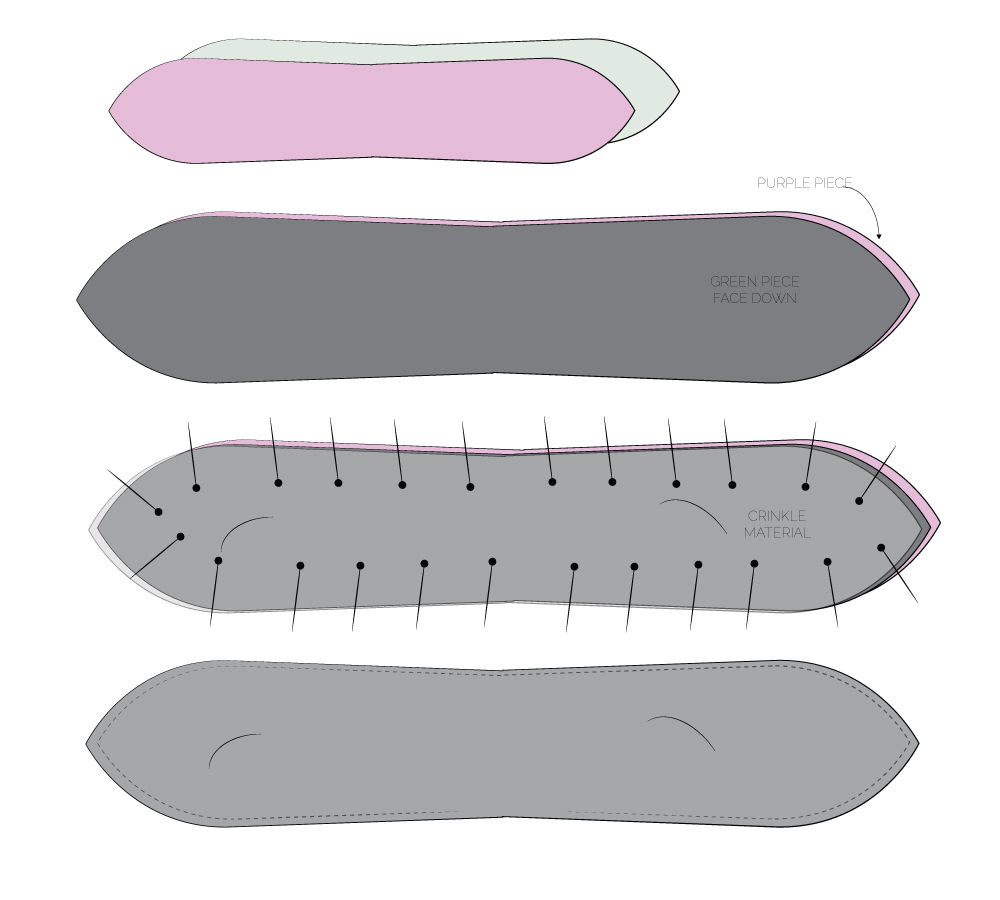
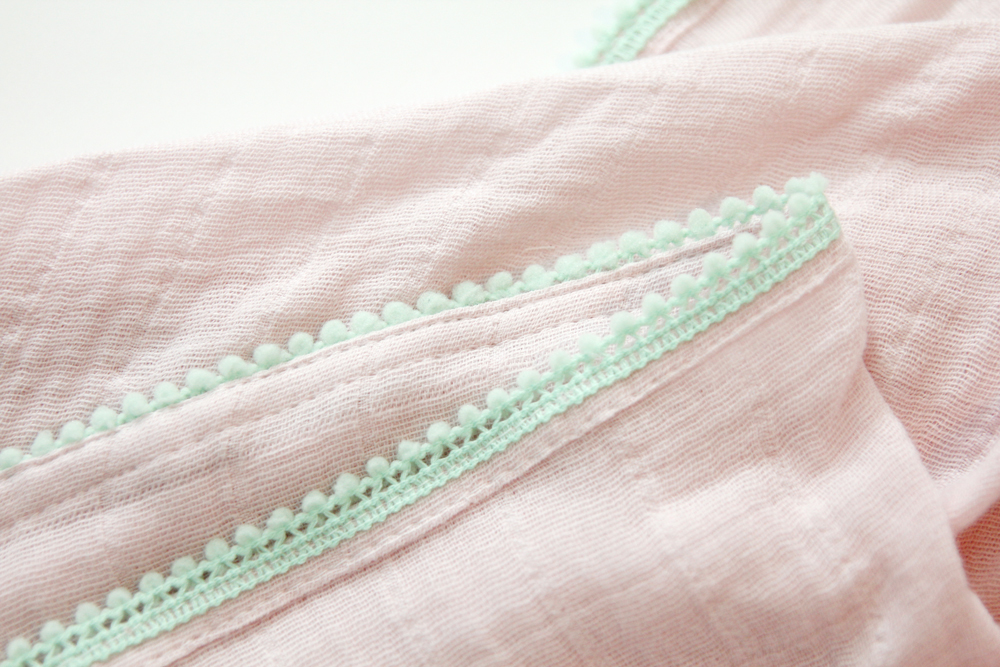
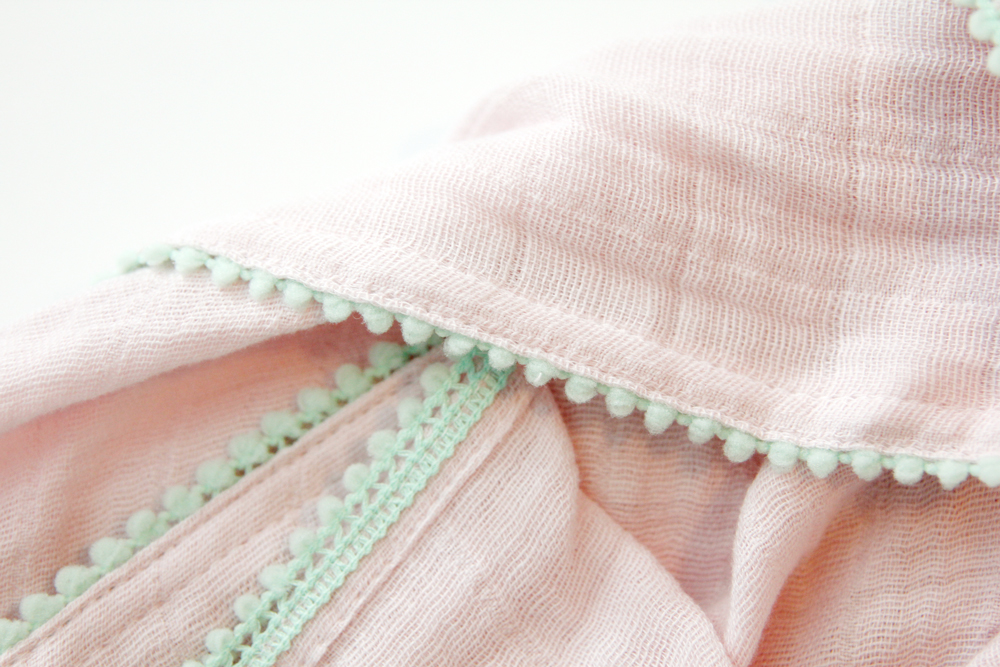
Clip the points of the fabric and turn through the opening. Push the edges out and press with low heat.

Make 2 more fabric pieces with remaining materials.

There is no need to finish the opening, since we’ll be knotting it onto the wooden ring.

baby-crinkle-toy-tutorial-4

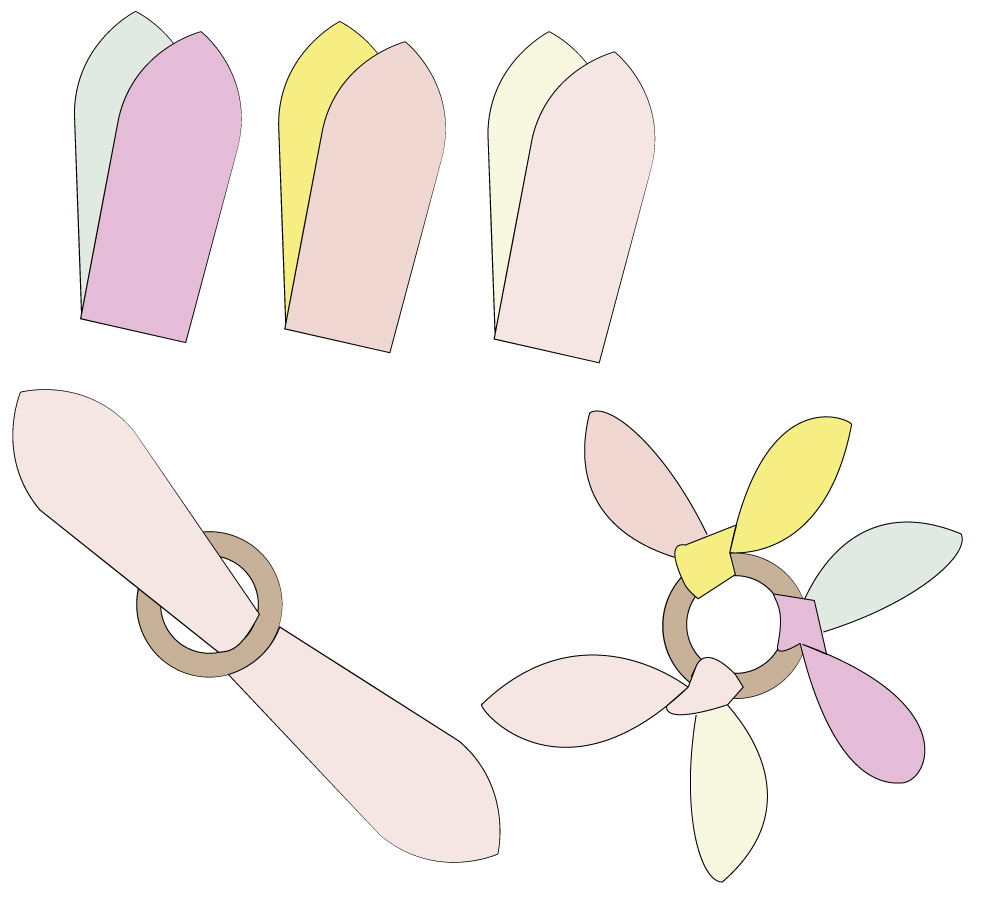
To wrap up this project, grab your wooden ring and tie the fabric piece around it. Make a knot and then make a second knot and pull the ends so the knot is really tight. Repeat with all 3 fabric pieces until you have 3 fabric knot pieces with extra ears sticking out.

baby-wooden-toy-1

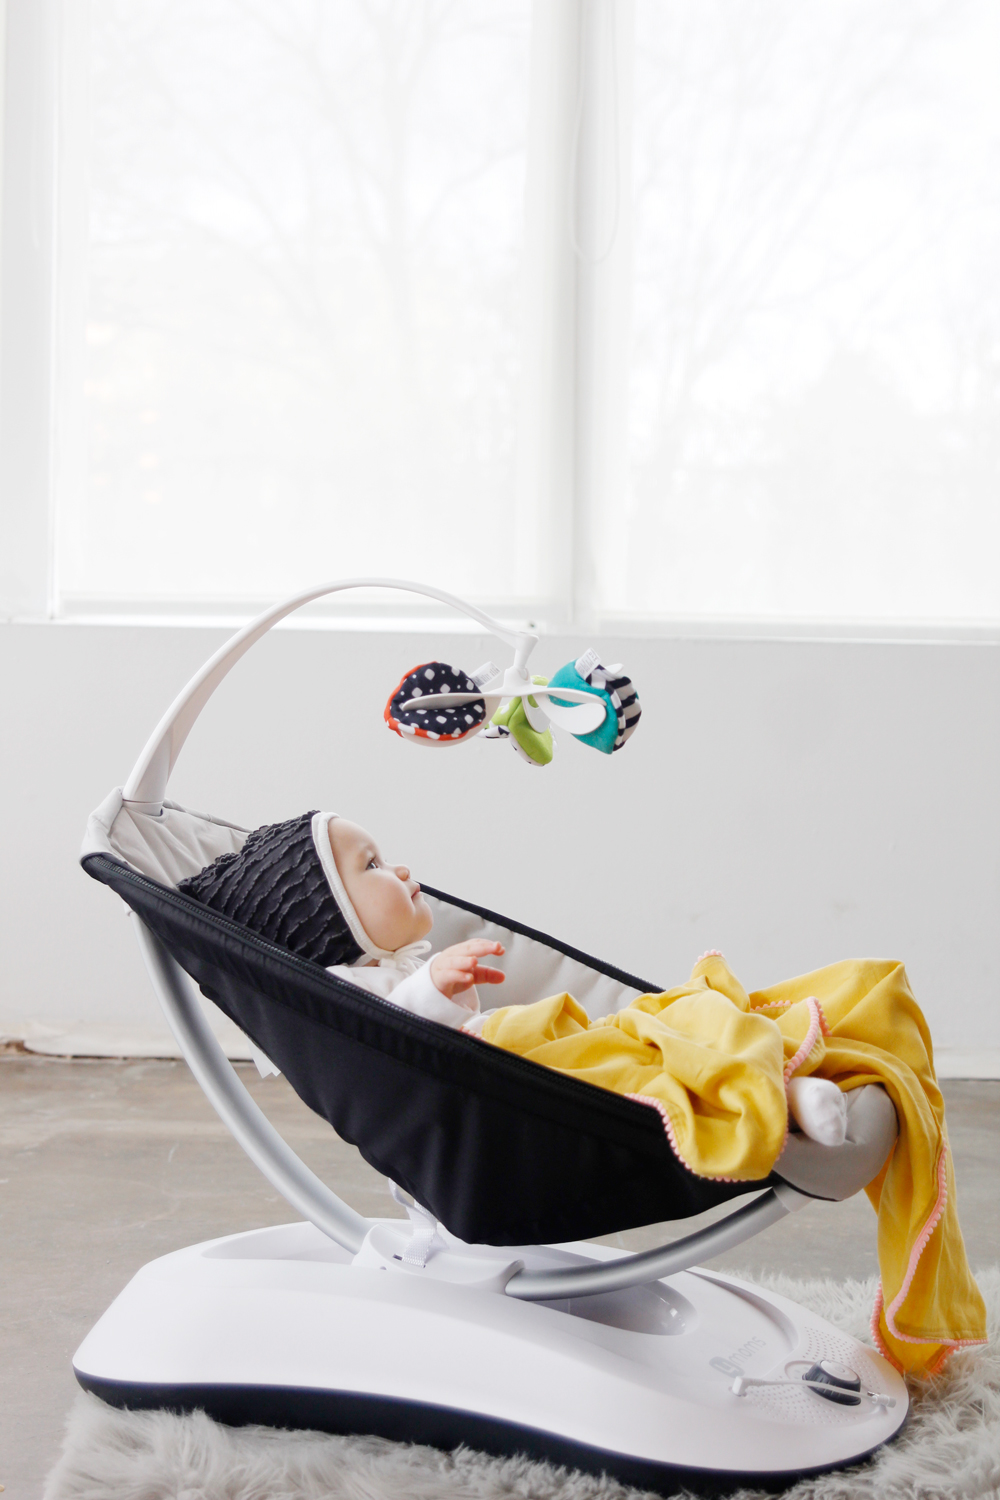
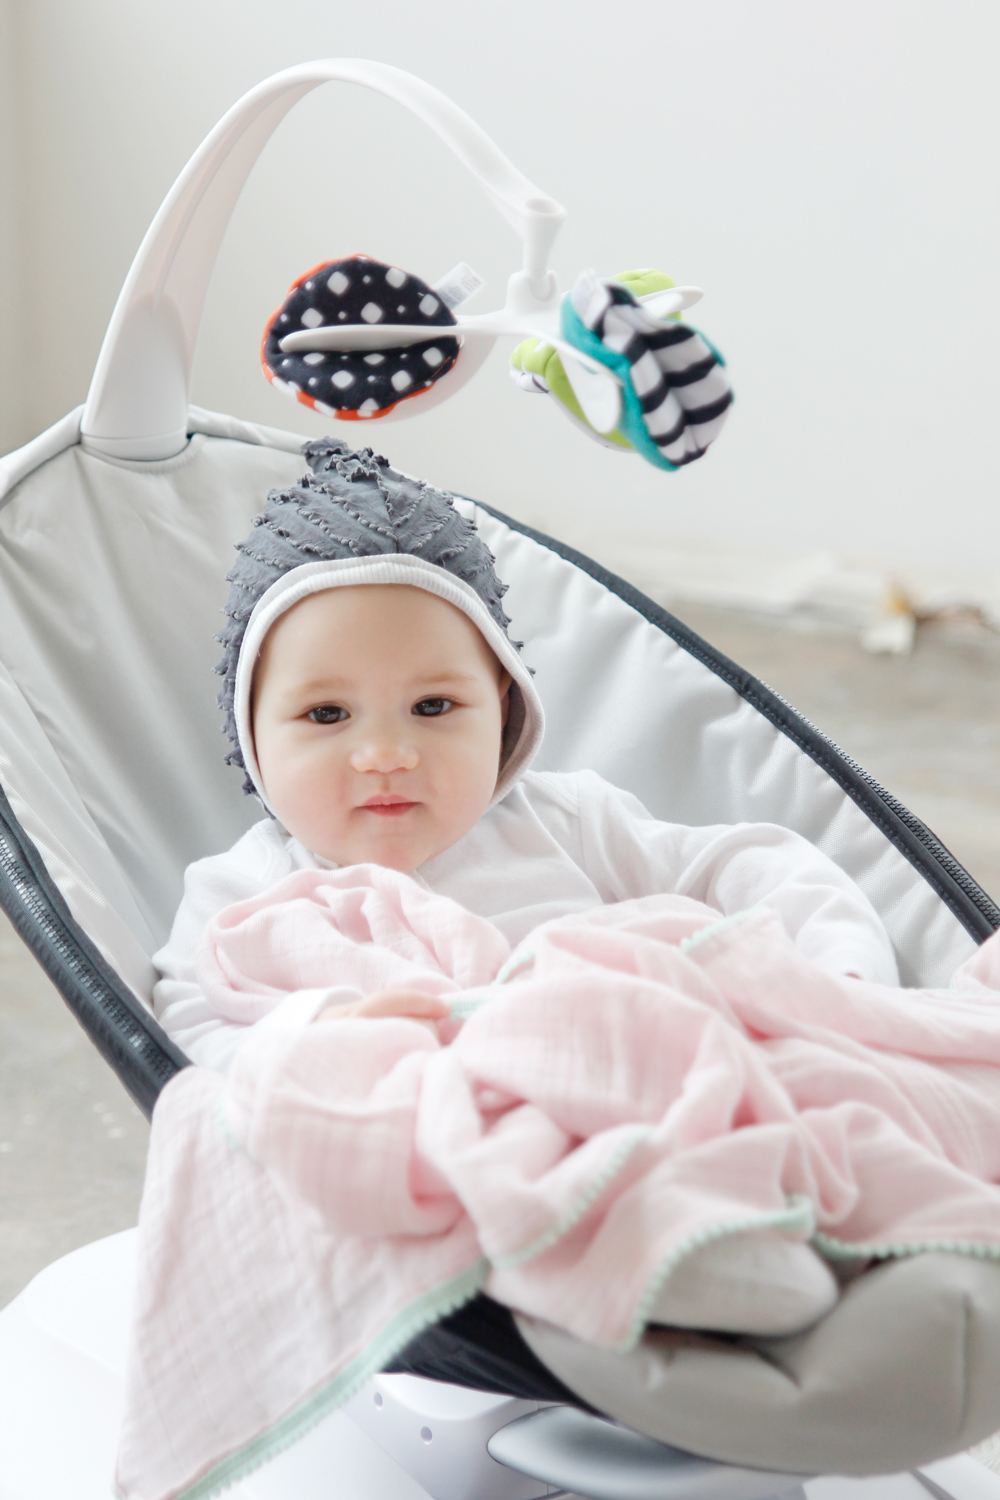
All done! The fabric is crinkly and makes a fun sound, and the wood is also great to grab. Hopefully this toy will be a hit!

Filed Under: Chic And On The Go, DIY, Gear, Mom Style Tagged With: baby, baby essentials, baby style, gifts, mom style, registry

JOIN TO OUR MAILING LIST!

Leave us your email to receive new posts and special offers for members only! Don't miss a thing!

DIY Paint Splatter Bibs

by Gugu Guru 3 Comments

See Kate Sew partners with Gugu Guru again to share a fantastic DIY tutorial.  This time? Paint splatter bibs to match up with her BABYBJÖRN Watercolor collection. Read on to get the details…

Make these cute and contrasty bibs for your curious new eater. They are also great for younger droolers and the stark black and white contrast will keep the attention of any little.

paint-splatter-bibs-13

These bibs are super simple to make and chic enough for your modern baby bag! And I had a great time splattering paint everywhere!

baby-bjorn-bibs

I loved styling them with BABYBJÖRN’s on trend Watercolor collection. The Baby Bouncer Balance in mesh is awesome for a few reasons! It packs down pretty much flat so you can hang it or store it easily when you’re not using it. We always put our bouncers in a closet in between babies and they are awkward and annoying to stow! But this is so flat it’s amazing!

baby-bjorn-watercolor-1

The bounce is right on and it has 3 different levels, that adjust like a chaise lounge-chair. Super simple to set up and super simple to use. I took it out of the box, lifted it up and snapped it in place. Shown is the Turquoise Turtle color that is so pretty and gender neutral (but not yellow! Hooray!) My little model had a blast bouncing in this chair and we just can’t wait to put our newborn baby girl in it. The mesh will be especially nice this summer as the weather heats up.

baby-bjorn-travel-crib-2

The BABYBJÖRN Travel Crib Light is so different than our old travel crib. It was also designed to flat pack, including a soft mattress that folds right into the carry case. It’s totally amazing how little it folds down to, but mostly how easy it was to set up. I usually make my husband set things up (I can’t read manuals, too boring!) but I didn’t need to even read the manual to get this crib up in 5 minutes. We are excited to take it to hotels and to also have an extra safe spot to put the baby at home. Safe from her rowdy siblings, that is. 🙂

baby-bjorn-travel-crib-6

The best part about this collection is the minimalist color scheme that will really go with anything. No tacky kid designs, just chic and functional.

So to round out your chic and modern baby collection, let’s make some bibs! I started with pre-made muslin bibs that are super soft and good for size 0-12M. But you can also make your own plain white bibs if you like sewing and then decorate them

Materials:

–pre-made white muslin bibs

OR make your own white bibs with this basic bib tutorial

-spatula, large paintbrush or spoon (for splattering!)
–heat set fabric ink

Other Supplies:
-large paper or newspaper to cover workspace
-clean piece of cotton muslin for pressing
-iron for pressing

paint-splatter-bibs-1

Instructions:

-Mix the ink with a little bit of water to get a better “splatting” consistency. The ink listed in the materials is water-based, so it will thin out with a bit of water.

-Do some practice splatting on your paper.

paint-splatter-bibs-2

Unsnap your bibs and lay them all out on your work surface.

paint-splatter-bibs-3

Then get splatting! There are no rules here, just dip your brush and fling paint all over the bibs and paper. You’ll figure out a technique as you go for getting good lines and blobs.

paint-splatter-bibs-4

This is really a fun and satisfying project, so go crazy! You can do as much or as little as you want.

paint-splatter-bibs-6

When you think you’re done, let the bibs dry. If you can leave them where they are to dry do that so you don’t smear any paint. Let them dry. This may take a day or two depending on how thick your splatters get. If you need to speed up the process, use a hair dryer.

paint-splatter-bibs-5

When they dry, lift them up and follow the instructions on the ink to heat-set the bibs. Use a press cloth (or a clean piece of cotton muslin) over the bibs to protect them as you heat-set the ink.

And you’re done! Snap your bib on and enjoy the paint splatters! These are extra great because food stains won’t show up as much!

Filed Under: Baby Registry, Baby Style, Design, DIY, Gear, Gift Ideas, Nursery, Nursery Style Tagged With: baby style, gear

JOIN TO OUR MAILING LIST!

Leave us your email to receive new posts and special offers for members only! Don't miss a thing!

DIY Flower Bouquet for New Moms

by Gugu Guru Leave a Comment

May is all about Mother’s Day, and while we love to celebrate Mother’s Day  – moms, especially new moms, deserve a treat anytime of the year! We asked Carrie Crowell, of Crowell Floral, to share a fun Springtime DIY project: creating a gorgeous flower arrangement which you could bring to any new mom in honor of her hard work and new baby. Take it away, Carrie!

View More: https://katrina-sorrentino.pass.us/crowell-floral

The days and weeks after a baby is born are often filled with visits from excited friends and family, new gifts, helpful (and sometimes unsolicited) advice, a little anxiety and a lot of joy. The best advice I’ve received from a new mother is that visitors should keep their drop­-ins short and sweet, ­to which I might add: why not leave behind a memorable and happy floral arrangement?

If you are feeling adventurous, it would be even more special if you created the arrangement yourself for the new mama and baby to admire during those sleepless nights. I love delphinium, spirea, queen anne’s lace, pink and white roses, snapdragons, sweet peas, anemones, and other delicate flowers. It’s best to avoid overbearing scents (like lilies and geraniums) and focus on a soft color palette and gentle fragrances. These brand­ new days should be acknowledged with beauty and tenderness.

Below you will find a step ­by­ step guide on how to create something spectacular and special for mama and baby.

Step 1: Gather your supplies (any craft or floral store should have all you need):  proper floral shears, opaque vase (if using foam), oasis/floral foam, flower food, a few different types of flowers from your local grocery store, wholesaler, or farmer: greenery, (ex. eucalyptus, Italian ruscus, or lemon leaf), a focal flower (ex. peony, rose, or dahlias), “wispy” elements and secondary focal flowers (ex. delphinium, larkspur, veronica, astilbe or ranunculus), base flowers (ex. hydrangea, hyacinths, etc)

View More: https://katrina-sorrentino.pass.us/crowell-floral

Step 2: Soak oasis in water and flower food until saturated and decide if you want to do a front facing arrangement for a mantle or against a wall or a full arrangement for a table.

View More: https://katrina-sorrentino.pass.us/crowell-floral

Step 3:  Start with the greenery – have some pieces drape over the sides and some going straight up. Here I used Eriostemon.

View More: https://katrina-sorrentino.pass.us/crowell-floral

Step 4: Then add your wisps and secondary flowers. I used spirea, larkspur, and ranunculus at various heights. 

View More: https://katrina-sorrentino.pass.us/crowell-floral

Step 5: Begin using some base focal flowers to fill in and cover up the oasis. This step creates a buoyant and bountiful arrangement. I used hyacinth and hellebores.

View More: https://katrina-sorrentino.pass.us/crowell-floral

 Step 6: Finally, add your main attraction! I used peonies. Make sure all the oasis is hidden and there aren’t any bald spots and that all the stems are in the foam to insure they are all getting a good drink.

View More: https://katrina-sorrentino.pass.us/crowell-floral

Happy Mother’s day to new moms, veteran mamas, and all those who guide and love us like a mother.

View More: https://katrina-sorrentino.pass.us/crowell-floral

All photos by Katrina Sorrentino for Gisele and George

Carrie Bio

Carrie Crowell was born in Nashville, TN and grew up spending her time between New York City and Nashville due to the beauty of joint custody. She loves dogs; casseroles; a good book; her parents; temperate overcast weather; thunderstorms; a well-set table; and of course, flowers.

Carrie lives in Nashville, TN with her husband and their two dogs (including logo mascot, Millie, as illustrated by Alix Pentecost-Farren).

Filed Under: Baby Showers, DIY, Gift Ideas Tagged With: gifts

JOIN TO OUR MAILING LIST!

Leave us your email to receive new posts and special offers for members only! Don't miss a thing!

DIY Pom Pom Swaddle Blankets

by Gugu Guru 12 Comments

I’m excited to partner with Guru Guru and 4moms today to bring you these DIY pom pom swaddle blankets! Pom pom trim is so fun to sew with and adds a fun pop of color to any project!

baby-swaddle-pom-pom

For these blankets, I used solid color double gauze and paired with a fun trim color. I never have enough swaddle blankets around with a new baby and with my third coming soon, I wanted some cute, washable swaddles that will also look really great in photos!

rockaroo-swaddle-blanket

The 4moms rockaRoo is so stylish in its sleek grey and these blankets look great with them! Some of my favorite features of the rockaRoo are the washable grey cover (no more pastel yellow baby products, yay!), iPhone jack and swing speeds.

rockaroo-4moms

We are super excited to use this with our new baby, but our model seemed to love it.

POM-POM-swaddle-blanket-

DIY Pom Pom Swaddle Blankets

Materials:
-1 yard double gauze fabric
-5 yards mini 1/4″ pom pom trim

Tools:
-Sewing machine
-Rotary cutter & Mat (optional)
-Scissors

Instructions:

pom-pom-tutorial

Trim double gauze down to 36″ by 44″, making sure all the edges are even and straight. (Diagram below shows a right and wrong side for clarification, but double gauze fabric is generally reversible.)
2Fold side edges over 1/4″ and press well.
Repeat on top and bottom edges.

4. Fold over all edges one more time, this time folding over 3/8″ on each side. Stitch around the rectangle 1/4″ from the edge. Backstitch when threads meet. You’ll have a nice clean edge, all ready for trim!

tutorial-1

tutorial-2
Get your pom pom trim ready. Pin or clip it to the back of the swaddle blanket with the poms right up against the edge of the blanket.

tutorial-4 tutorial-3
Stitch along blanket 1/8″ from edge, securing the pom pom trim as you go. You’ll end up with 2 straight lines of stitching that leave a nice clean finish to the blanket.

tutorial-6
When the pom pom trim meets itself, overlap the ends and taper them into the inside of the blanket before stitching. Trim excess.

tutorial-7
All done and ready to snuggle your sweet baby or package up for a baby shower gift!

See Kate SewKate Blocher is a mother of 2 (and a half!) and creator of See Kate Sew, a DIY and sewing brand that focuses on a creative lifestyle. While she isn’t teaching her kids to make creative messes, you’ll find her designing fabric and sewing patterns and buying more fabric! Find more from See Kate Sew at seekatesew.com.

Filed Under: Design, DIY, Gift Ideas

JOIN TO OUR MAILING LIST!

Leave us your email to receive new posts and special offers for members only! Don't miss a thing!

« Previous Page

Footer

Follow Us:

  • Facebook
  • Instagram
  • Pinterest
  • TikTok

COME AND GET IT!

Leave us your email to receive new posts and special offers for members only! Don't miss a thing!

· Midnight Theme

Copyright © 2025 · Guguguru, Corp. All Rights Reserved.