• Skip to primary navigation
  • Skip to main content
  • Skip to footer

Gugu Guru simplifies collaborations with mom creators.

Teaching brands how to build mom creator communities.

  • For Brands
  • For Creators

DIY

A Gugu Guide’s Fall Faves

by Gugu Guru Leave a Comment

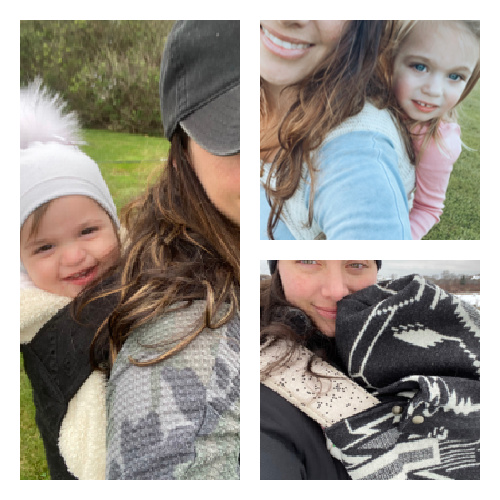
Meet a Gugu Guide: Anya Machala. Anya is a pastry chef and now SAHM of two girls ages three and one. Anya and her family love to get outdoors no matter the weather. She loves to craft and do anything DIY and is always looking for new fun sensory and learning activities to make for her girls. This Rhode Island mama of two girls LOVES fall and here shares some of her favorite fall activities and a few product recommendations too. From her go to carrier to a delicious recipe for the whole family and an easy Halloween costume idea, check out her fave Fall picks below.

Carrier stash left to right: Black Eyelet Scout no leather; Tapri Scout no leather; Seek 15 scout with leather; Natural Eyelet Scout with leather; Magnolia 5 scout with leather; Happy Baby Carrier Strewn OG; Happy Baby Carrier Cake Toddler

Fall Baby Carrier Pick: Sakura Bloom Scout

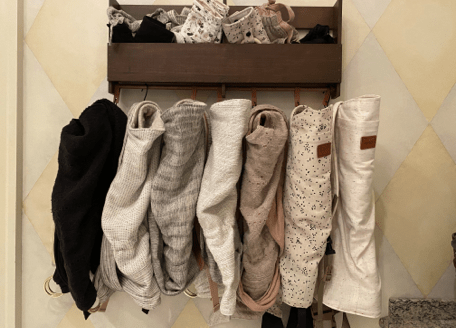
I admit, I do have a bit of a carrier stash problem but my favorite right now is the Sakura Bloom Scout. I can carry both of my girls comfortably in it for hours. It has the ability to carry from newborn and while at that point my favorite was a Happy Baby Carrier, now with them weighing more, I find the Scout disperses weight better for me. I can tandem carry my girls, or just chase one while carrying the other on my back and it gives me the ability to be hands free. We frequently take long walks and I always reach for my scouts. They have beautiful color options as well as different fabrics too. I personally like the leather option on the arms straps as I feel it gives me a little more support. For carrying in the fall I use an Ollie & I Pendleton carrier cover. The wool keeps out the chill and I love the option of the removable hood. My youngest daughter was an infant las winter and it gave me the option to get my toddler outside almost every day without the fear of her getting cold. Because it’s not really safe to carry a baby with footies on, due to the possibility of cutting off circulation, the carrier cover was the perfect option.

Seen here: Pom hat from the gifted baby NY; Ollie & I carrier cover

Fall Recipe: Picky Eater-Friendly Risotto
Quick, simple, flavorful and customizable
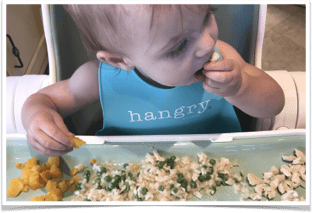
My girls love rice. I mean who doesn’t but what is better than creamy risotto? Especially during fall. Both of my girls are dairy free due to allergies so it’s not easy to find something that will substitute the creamy texture while having to sub dairy. Enter veggie medley risotto. Not only is it filling, it can be customized to the pickiest of palates.


What you will need
– 1lb of chicken. I use tenderloins since they easy to cut up into chunks
– Chicken stock
– Small onion diced
– 1 garlic clove minced
– Arborio rice
– Small pot
– Measuring cups (liquid and dry)
– Frozen veggies (any kind my girls like peas)

How to make it
1. Cut chicken into small chunks and season with salt and pepper
2. Dice onion and mince garlic
3. Measure out 3 cups chicken stock
4. Put a drizzle of olive oil over medium heat and sauté onion and garlic until softened about 3 min.
5. Add chicken to pan and brown
6. Add a mounded 1 cup of arborio rice to pan and stir until coated with olive oil.
7. Add 2 cups of the chicken stock bring to a boil and then reduce to a simmer
8. Simmer without stirring until almost all liquid has reduced
9. Slowly add remaining chicken stock little by little stirring after each addition
10. When rice is cooked and liquid is almost all gone add in 1 cup of the frozen veggies of your choice and stir to combine. The residual heat and small amount of remaining liquid will cook veggies.
11. Enjoy!

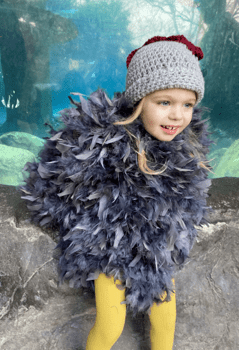
DIY Halloween Costume: Fluffy Chicken Costume

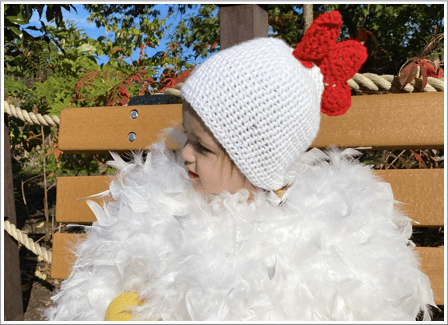
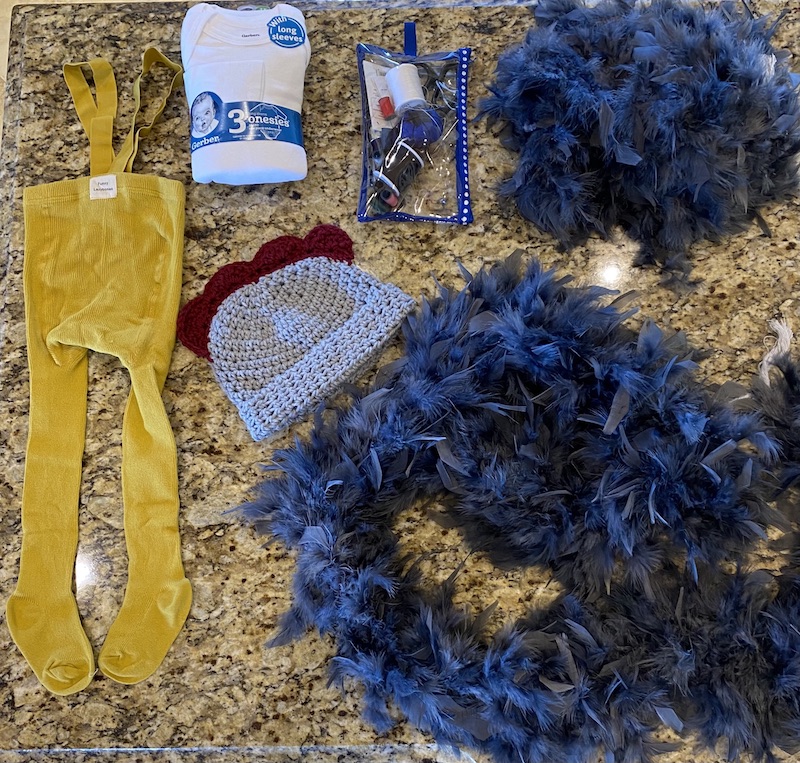
In my quest to find a super cute outfit for my daughter I stumbled upon a fluffy chicken. Only problem was THEY WERE 175$ ON ETSY!! I really didn’t want to pay that much for a costume that might only get used once (being reused again this year for my second daughter) so I found a way to DIY one. Scrolling amazon I found feathers but tried to think of the easiest way to attach them. Single feathers would be tedious and take forever so I thought maybe a string of feathers? Enter the feather boa. Super fluffy, easy to work with and so many color choices. Next I thought how to attach them? My husband suggested fabric glue or hot glue but that would weigh down the feathers and make the outfit stiff. My sewing skills are not top notch so I watched a video on simple ways to tack items and found out how easy it could be!! I ordered two onesies, one for underneath for warmth as well as protection from feathers and tack spots (my daughter gets itchy easily), suspender leggings in yellow so they don’t fall down, a crochet chicken hat from Etsy (I can’t crochet and yay for supporting local businesses) and yellow moccasins.

I laid out all the boas and tacked them on to the onesie one by one. Make sure when doing this you hold up the onesie to check for bare patches. I started with the arms and across the collar. The arms are the most tedious because of turning them inside out to see where you’re attaching the feathers. Then I zig-zagged across and up and down the onesie to cover it fully. Again make sure to test out on your child BEFORE wearing out (I found a few bald patches that looked full when doing this early this morning with my 3 year old’s grey chicken costume). Be fair warned that your house will be full of feathers and everywhere your child walks will leave a trail of them!! I did simple one flat colors for my kids but I’m sure you could add in another accent color for some dimension. I seems daunting but it’s so easy and really fun to see the smiles on my kids faces as they are running around!

Links for materials
Onesies
Feathers
Leggings
Hat

Filed Under: Babywearing, DIY, Mom Style

JOIN TO OUR MAILING LIST!

Leave us your email to receive new posts and special offers for members only! Don't miss a thing!

DIY Baby Headband Tutorial with See Kate Sew

by Gugu Guru Leave a Comment

See Kate Sew partners with Gugu Guru once again to share a fantastic DIY tutorial. This time? How to create DIY baby headbands. This tutorial features the 4moms mamaRoo4. Don’t forget to enter for a chance to win one of these next level baby swings at the end of this post.

(Realizing I may have gone a little overboard with the baby pictures on this one, whoops!) But I’m thrilled to be back at Gugu Guru today with this cute DIY baby headband tutorial! You can check out more sewing and crafts at SeeKateSew.com!

DIY baby headband

I used knit (stretchy) fabric to create a 4-strand braided headband with a frilly ‘bow’ at the top. This requires only a little bit of actual sewing, most of the construction is pretty easy!

DIY baby headband

I love fun DIY baby headbands and especially love making them with really soft floral fabric. I used two types of fabric to get two slightly different looks! The black floral fabric is a stretch velvet, which curls up into a tube when you stretch it so it was a little easier to braid and has a thicker finished product. The pink floral is brushed polyester fabric, which is amazingly soft and doesn’t curl up as much for a flatter braid effect. Since these use knit fabric, it’s a great headband to go with a handmade outfit for a matching ensemble!

DIY baby headband

Scroll to the bottom of this post to enter to win a 4moms mamaRoo! We are loving this baby swing, you can read the rest of my review of the 4moms mamaRoo4 over at my blog, See Kate Sew.

Materials//

-1/2 yard Stretchy Knit Fabric

-large hair clip or tape

DIY baby headband
Instructions//

Cut 4 rectangles 24″ by 3″. If you are making this headband for a larger child, cut the pieces longer. We’ll trim them down at the end, so longer is better here.

DIY baby headband

Stretch each strand so the edges curl over. This will happen differently for different types of knit fabric. If the fabric curls the wrong way, press the strands in half with the right sides showing instead.

Now we’re essentially going to make a 4 strand braid!

DIY baby headband

Start by clipping the 4 strands about 4″ from the top of the strands. You can also tape them down to a surface like a table. I taped the open end of my clip to keep them all secure in there but you may not have to do this depending on the clip!

A 4 strand braid is made by crossing strand 3 over strand 2. Then cross 3 over and under 1 and 2 over and under 4. Next cross the 2 middle strands, 3 over 2 and cinch all the strands up for a tighter braid. Continue this process. Braid until there are about 4″ left.

DIY baby headband

Cross both ends of the headband to create a circle and meet the ends of the braid. Pin them together and sew right through the middle using a zig zag stitch. I like to make 2 passes so it is very secure.

Pull out one of the strands and tie it over the stitching so you can’t see it. This will also make the top look like a bow. Trim to your desired length.

DIY baby headband

4moms mamaRoo4 giveaway

Filed Under: Baby Style, DIY

JOIN TO OUR MAILING LIST!

Leave us your email to receive new posts and special offers for members only! Don't miss a thing!

DIY Circular Playmat with See Kate Sew

by Gugu Guru Leave a Comment

See Kate Sew partners with Gugu Guru once again to share a fantastic DIY tutorial. This time? A DIY circular playmat. This tutorial features Tranquilo Mat. Don’t forget to enter for a chance to win one of these soothing, sleep miracles at the end of this post.

I’m excited to be back on Gugu Guru today with a new baby and a new sewing tutorial! You can check out more sewing and crafts at SeeKateSew.com! Today’s tutorial is a circular playmat that you can whip up in an hour! This playmat is great for throwing on the floor for tummy time and stashing in a diaper bag for outings. We use this playmat paired with the Tranquilo Mat to make tummy time pleasant for everyone! You can read my review of the Tranquilo Mat over at See Kate Sew today and download the free printable pattern for this playmat!

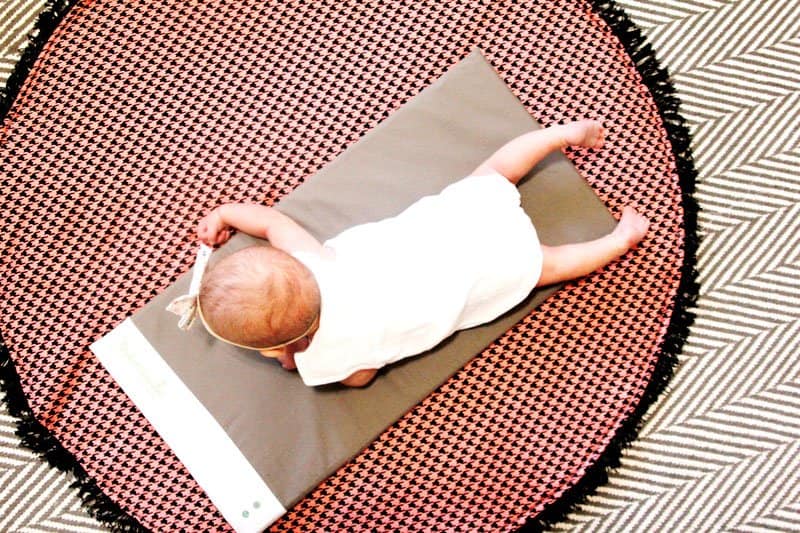
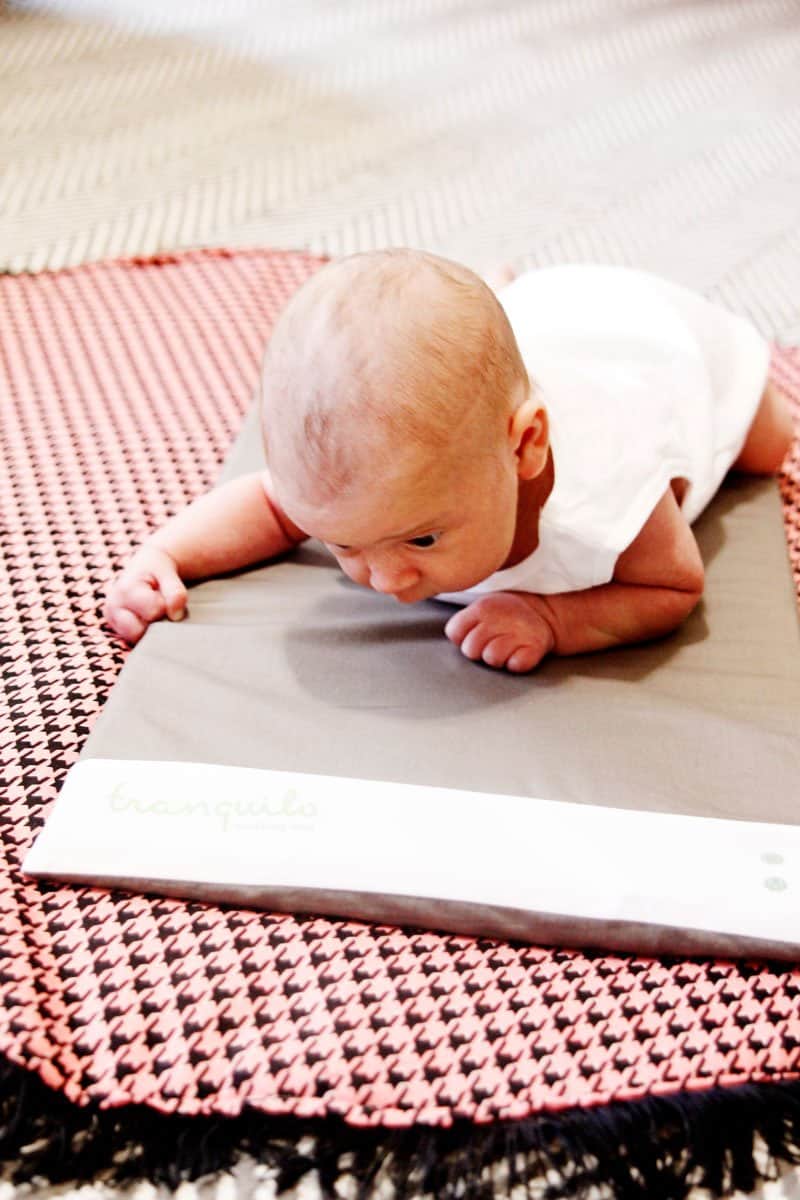
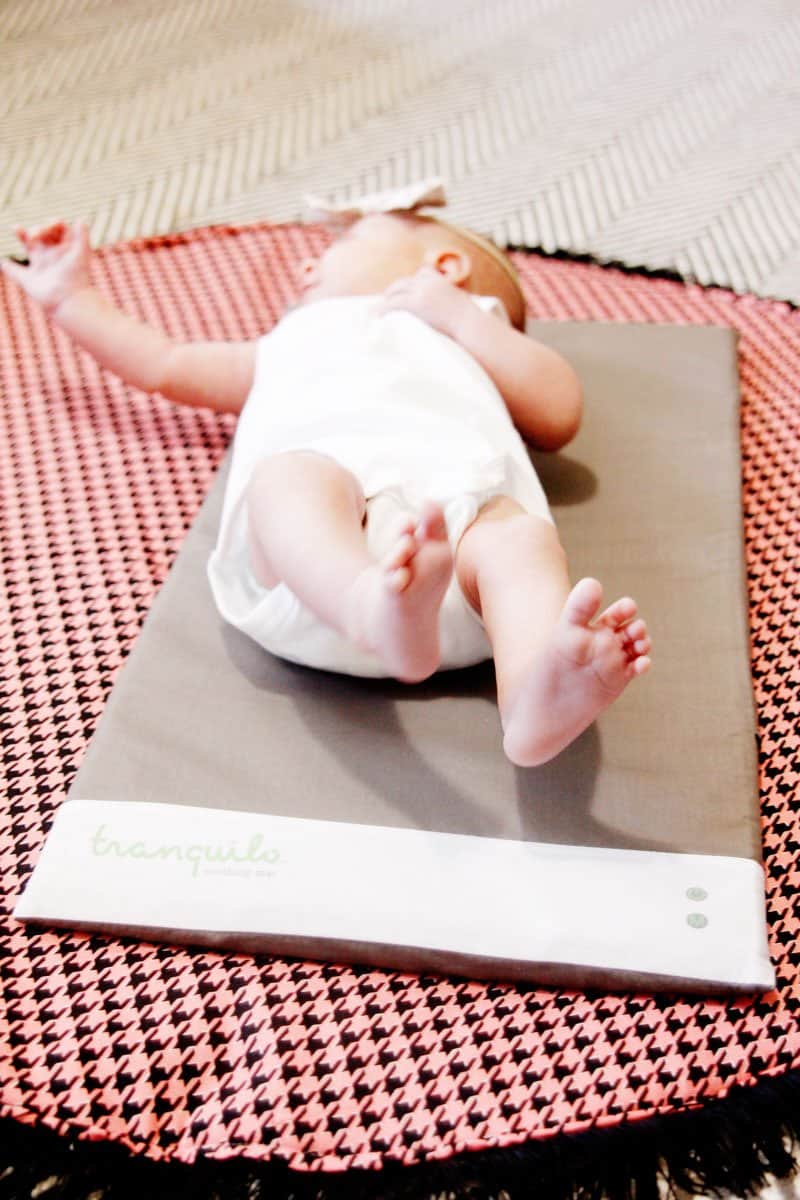
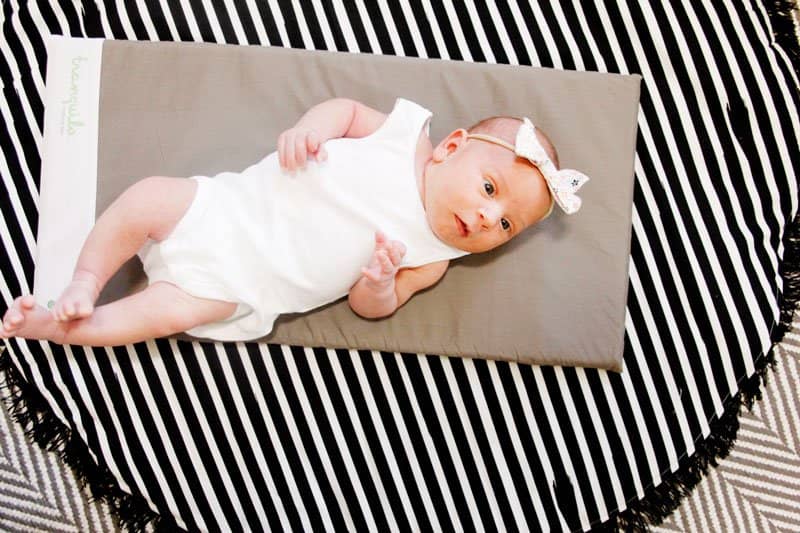
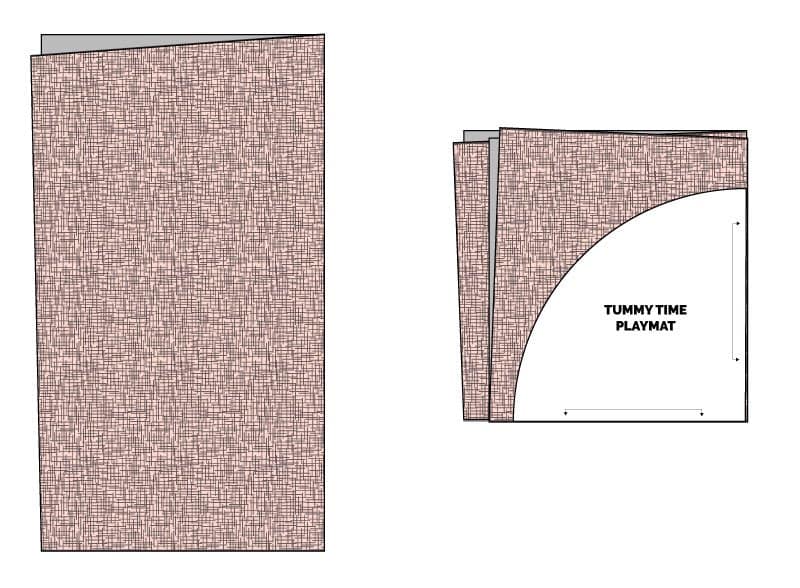
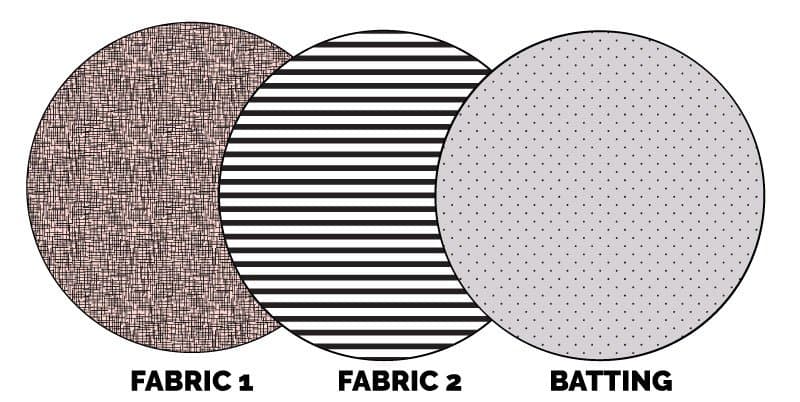
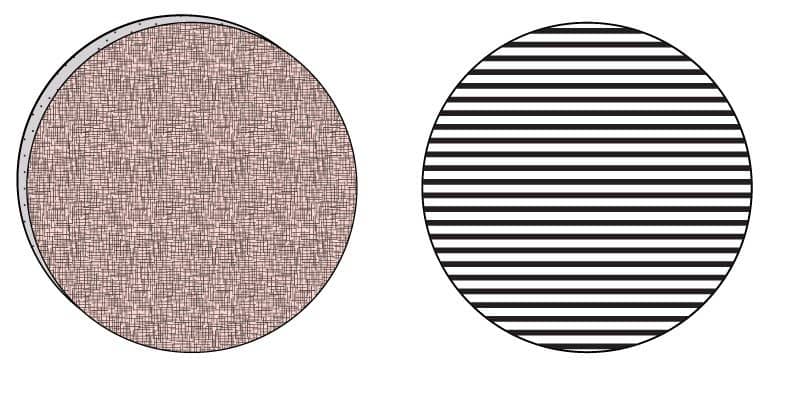
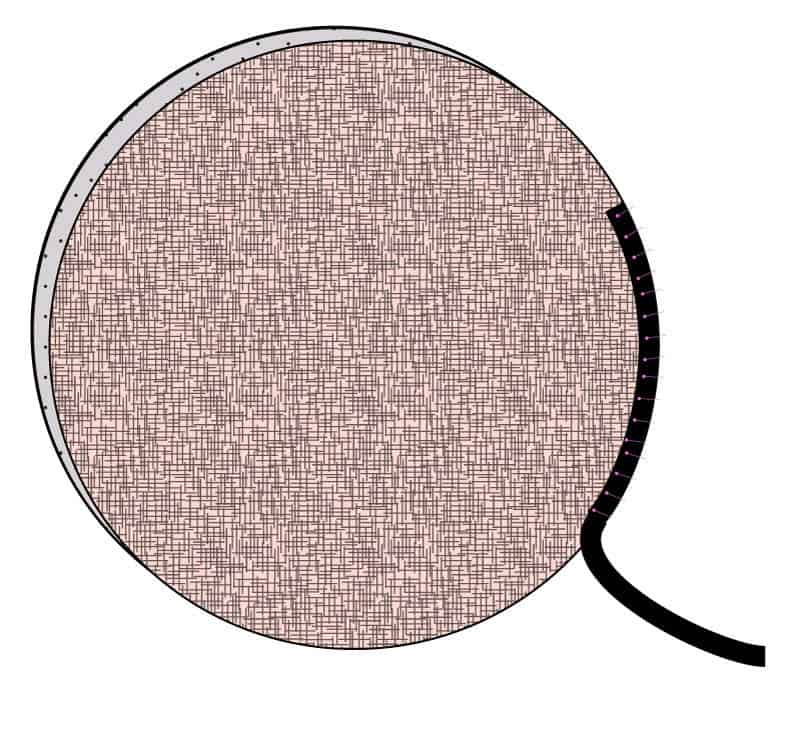
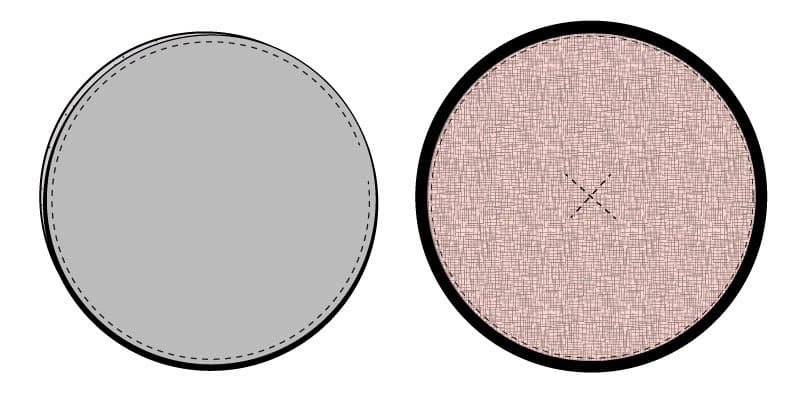
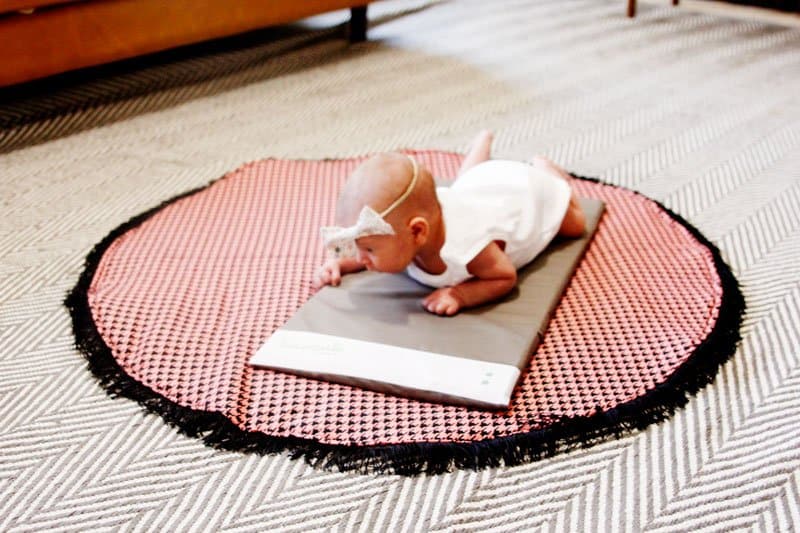
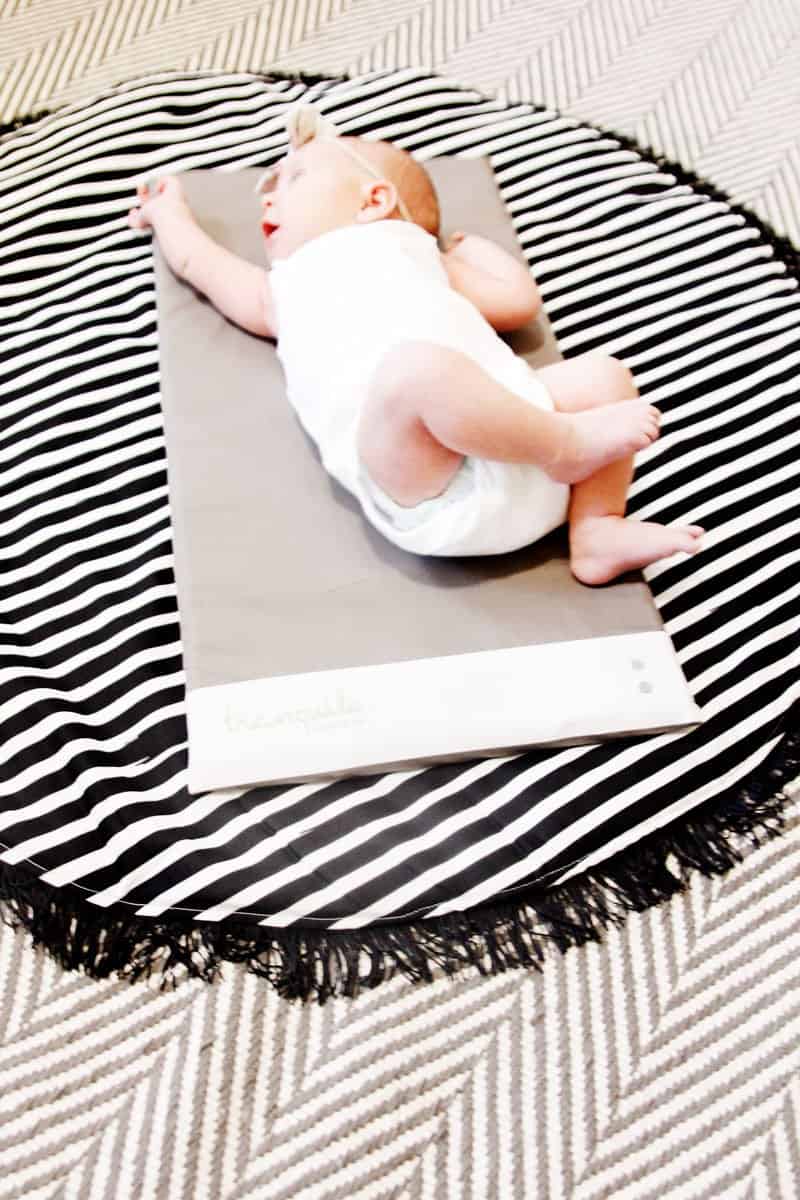
I used high contrast fabrics for the mat and it’s reversible! The high contrast will keep baby’s attention which I always find to be calming for them! This playmat finishes about 3′ across, which is a perfect size for a newborn baby. I’m guessing we’ll be able to use this until she crawls! I added a fringe trim around the edges which gives it a fun, modern twist!

Materials//

-1 yard cotton fabric
-1 yard cotton contrast cotton
-1 yard batting
-2″ black fringe trim
–Free Pattern download

INSTRUCTIONs//

Use 1/2″ seam allowance.

Download the pattern pdf and print off the pattern piece at 100% (DO NOT SCALE). The file will print on 6 pages. Trim the extra space around the pages and tape them together like this:

Cut out the pattern piece.

Fold 1 yard of fabric in half longways and then in half again the other way so you have a little corner of fabric. There will be fabric folds on two sides of the fabric. Place the pattern piece corner (where it says ‘6’) right on that corner and pin it to the fabric.

Cut out 1 piece from each fabric and 1 piece from batting.

Pin the batting to the back of the front fabric.

Pin the fringe trim around the front piece, with the fringe facing towards the middle of the mat.

Lay the front and back fabric together, with right sides together (the batting will be on the back of one of these pieces). Sew together at 1/2″ around the circle, leaving a 4″ opening for turning.

Turn the whole thing right side out and press the edges well. Then topstitch 1/4″ from the fringe. Add a little X of stitching in the middle of the mat to keep the layers together.

Tranquilo Mat Giveaway

Filed Under: Baby Registry, DIY, Newborns, Sleep

JOIN TO OUR MAILING LIST!

Leave us your email to receive new posts and special offers for members only! Don't miss a thing!

DIY Valentine’s Day Onesie

by Gugu Guru Leave a Comment

See Kate Sew is back for another fun and easy tutorial, this time for a onesie just in time for Valentine’s Day. Read on for instructions on how to make this adorable onesie. Want to see more DIY posts from See Kate Sew? Check out some of our favorite tutorials. 

Baby you’re breaking my heart! I’m excited to be back here at Gugu Guru this month sharing a project for my favorite holiday! Babies in pink things and hearts make Valentine’s Day so fun. But I also love that hearts and pink don’t have to be holiday specific, so this little ruffle onesie will work all year long!

I created this little download so you can decorate your own onesies! You can purchase a blank onesie (bonus points if it’s pink or red, but white works too!) or make your own. I used my ruffle onesie pattern with the large sleeve ruffle! Ruffles are also extra flirty for Valentines! And how cute is it with the DockATot Grand?! The new Fairytale collection has the prettiest prints, I fell in love with La Vie en Rose and think its a super pretty home accent piece that is also very functional! Read more about the DockATot over at my blog today! We’ll be using DockATot for the last year and a half and love the versatility of the Grand size! And enter to WIN your own on this post!

Back to the onesie! <3 <3 The decoration is made with iron-on vinyl that I cut with a Cricut machine and then pressed on with the Cricut EasyPress (but an iron works, too!). If you don’t have a cutting machine you can use the design as a template for fabric paint or an appliqué with fabric.

Valentine’s Day Heartbreaker Onesie

Materials//

-Ruffled Onesie, I love this lace ruffle onesie or make your own with this pattern

–Iron-on vinyl and cutting machine OR

–fabric paint OR

–fabric +heat n bond

Instructions//

Depending on how you are going to complete this project you’ll have different steps. But for the iron on, upload the attached svg file into your cutting machine interface and cut it with MIRROR ON with iron-on vinyl. I recommend bold black, or maybe glitter pink!

Peel the negative space from around the design and lay centered on the onesie, about 1.5 inches from the neckline.

Iron the design onto the onesie based on the instructions that came with the vinyl. Peel it off!

That’s it! Now try it on that cute lil’ baby.

Filed Under: Baby Style, DIY Tagged With: baby style

JOIN TO OUR MAILING LIST!

Leave us your email to receive new posts and special offers for members only! Don't miss a thing!

DIY Chambray Maternity Refashion

by Gugu Guru Leave a Comment

See Kate Sew is back again today with another maternity refashion! 

I’m over at Gugu Guru again to day with a 3rd installment in a little maternity refashion series! I’ve had a lot of fun with this series so I hope you have too! All three of these posts have taken an oversized men’s shirt or sweatshirt turned it into a maternity top with a few quick cuts and stitches.

We partnered with Ryla Pack for this post! The Ryla pack diaper bag is a new backpack style diaper bag with all the right pockets! I love this bag and super love the bag’s attention to detail. There is a purpose for every single pocket! A pocket for bottles, diapers, wipes, a cellphone and more. It’s a nice and sleek bag that fits all! You can use my code SEEKATESEW to save 20% on your own Ryla Pack! Hop over to See Kate Sew to read my review of the pack!

This refashion is very simple! I purchased an oversized short-sleeve men’s top and just took in the side seam from the sleeve down to the hem in one fell swoop! It has a swingy shape to it which is flattering and easy to wear, especially over maternity leggings or even jeans. An extra feature of this refashion is the addition of a necktie. I used a black and gold polka dot for the tie, which just adds a little class and a little color to the outfit. You can even make a few ties and switch them out to change up the look of the same top!

Materials:

-oversided chambray SHORT sleeve men’s shirt

-1/4 yard quilting cotton for tie

Instructions:

Try the shirt on, pinch under the armpit where you want to bring the shirt in and mark it with a pin or disappearing ink pen. Do the same on the sleeve and note how many inches from the side seam you have pinched.

Take it off and turn inside out. Sew from the sleeve to the hem, following your marks.

It’s really that easy!

To make the tie, cut 2 strips of fabric 44″ by 4″. 44″ is the width of a standard bolt of quilting cotton, so you can just cut it right from the edge of your length of fabric without measuring.

Fold strip in half with wrong sides together and press. Sew the long edge.

Turn the tube right side out and press. Turn the short edges under and topstitch.

Find the middle of the tie and fold it over. Stitch about 10″ (5″ on either side of middle point). This will help the tie fit around the collar and stay flat.

Tie it up and you’re done!

This is also really cute without a belly! And since it’s button-up, it’s great for nursing!


Filed Under: Bath & Diapering, Chic And On The Go, Diapering, DIY, Mom Style, Pregnancy Style

JOIN TO OUR MAILING LIST!

Leave us your email to receive new posts and special offers for members only! Don't miss a thing!

Pregnancy Hacks: DIY Maternity Shirt

by Gugu Guru Leave a Comment

See Kate Sew partners with Gugu Guru once again to share a fantastic DIY tutorial.  This time? A DIY maternity hack using a men’s flannel shirt. Want to check out more DIY projects from Kate? Click over to see the full list – lots of fun weekend DIY ideas! 

I’m thrilled to be back at Gugu Guru sharing another DIY maternity hack as a part of a little series. Each of the three projects uses a simple men’s clothing style that you can find at most thrift stores. With a few little chops and a bit of sewing you can make your own maternity wear! See post #1 here.

This is the second post in the series and uses a flannel men’s button-up as a base. I used a large size that would have plenty of fabric for a belly.

We partnered with Newlie to style up this outfit! Newlie’s diaper bags are super classy inside and out! I love the Lily Tote Diaper Bag, it has tons of pockets, a changing pad, 2 strap options and a gorgeous faux leather exterior. It comes in a few colors, but black went best with this outfit 😉 I also love the Sophia bag, the black and white stripes are really cute! I love a diaper bag that doesn’t look like a diaper bag and Newlie’s fit the bill while still being holding all of a diaper bag’s functions!

I love DIY refashions and this one is a super quick sew! All we’re doing is taking in the waist so the fabric drapes over the belly! I did this on a dress form, but if you don’t have a dress form you can try it on yourself to get the placement right.

Materials//

-1 Men’s button-up in 2XL or 3XL

-1/2″ elastic, measure below your bust in the front to figure out how much elastic you need. If your measurement is 18″, cut an 18″ piece of fabric

-basic sewing supplies

Instructions//

To take in the back of the shirt, create pleats following the checks on the fabric. Pleats are pretty easy to make when you have 1″ squares to use as your guide.

Create 4 pleats facing into the center on each side of the shirt. My pleasts start about 5″ below the yoke and I sewed the whole square down from the top of the pleat to the bottom to make a nice clean finish. Backstitch at each end. Taking in the back a few inches makes the shirt look fitted instead of baggy.

After you’ve sewn all the pleats down, backstitching at each end, clip all the threads to clean it up!

The front requires basic stretchy elastic. We’ll sew this to the inside of the shirt. Pick a row at the bottom of the pocket that hits right under the bust. If your shirt is different than mine, try it on and find a spot below the bust. Draw a line on the inside of the shirt with a dissappearing ink fabric pen. Stretch the elastic to fit across the line you drew. Pin it as you stretch. Then sew across the middle of the elastic using a zig zag stitch.

Roll up the sleeves for a cozy look and you’re done!

Filed Under: DIY, Mom Style

JOIN TO OUR MAILING LIST!

Leave us your email to receive new posts and special offers for members only! Don't miss a thing!

DIY Maternity Refashion with See Kate Sew

by Gugu Guru Leave a Comment

See Kate Sew partners with Gugu Guru once again to share a fantastic DIY tutorial. This time? A DIY maternity refashion tutorial. Want to check out more DIY projects from Kate? Click over to see this list! 

DIY Maternity Refashion
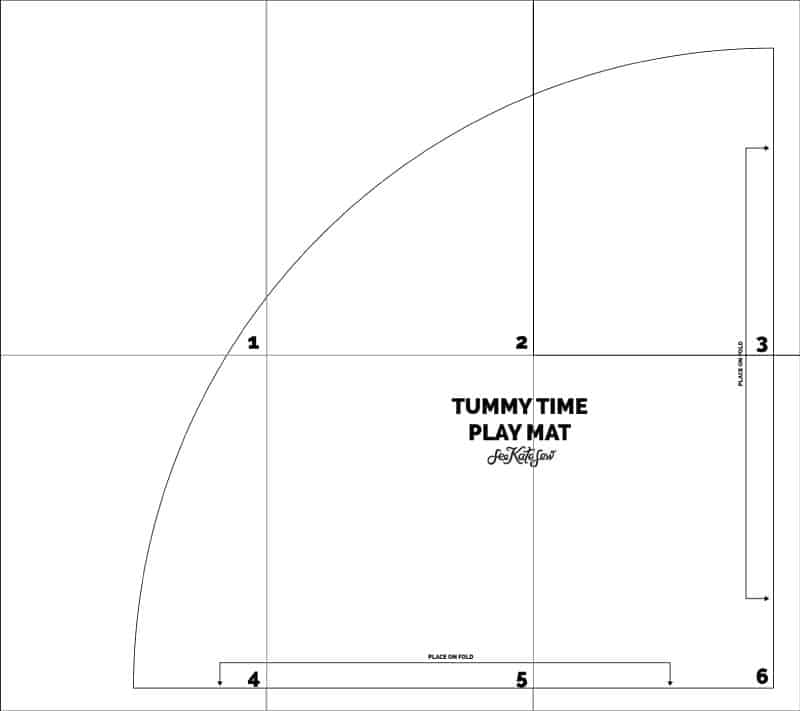
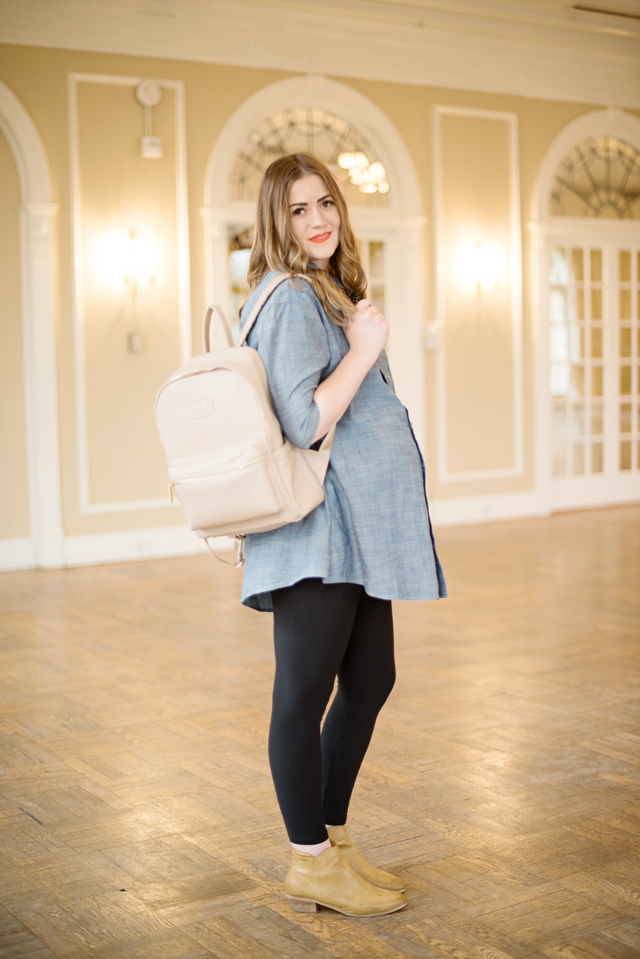
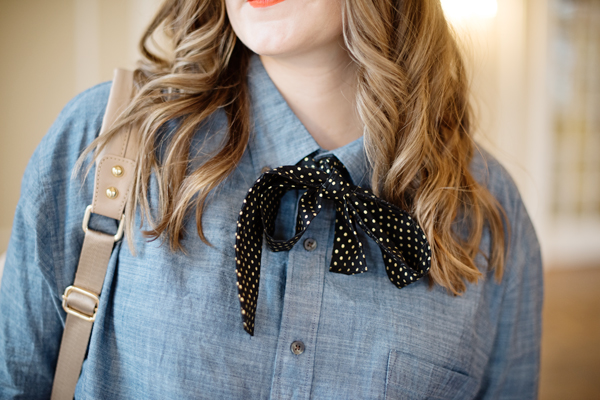
I am so excited to share this DIY maternity refashion tutorial. If you’ve wanted to try sewing for yourself, the maternity months are a great time to try it! Not only will you find yourself needing new clothing, no one will notice crooked sewing lines with a cute belly to focus on! Making your own maternity clothes is simple when you start from existing garments!

DIY Maternity Refashion and TWELVElittle

We partnered with TWELVElittle for this DIY maternity refashion post, this is my second TWELVElittle bag and I love it. I wanted a diaper bag that was a bit high fashion and this leopard print does it for me! It’s a perfect pop of pattern for an otherwise basic outfit and has all the nooks and crannies you need for mom life!

This sweatshirt refashion is pretty quick and I love the result – a dropped sleeve tunic with extra long sleeves and ruffles that look like bells! I started with a size 3X mens sweatshirt (and a second one for extra fabric!). You can find them at the thrift store or a cheap rack at Walmart. Pair it with maternity leggings and you’ll be set and cozy for all 9 months!

It’s just right to hug your belly and also perfect for loose postpartum wear during the new baby stage.

Let’s get sewing!

Materials//

-2 Oversized Sweatshirts

-Coordinating thread

–bell ruffle pattern

Instructions//

First up, cut off those sleeves! Follow the armhole seams and just cut the whole sleeve off. Do the same with the waistband.

DIY Maternity Refashion tutorial

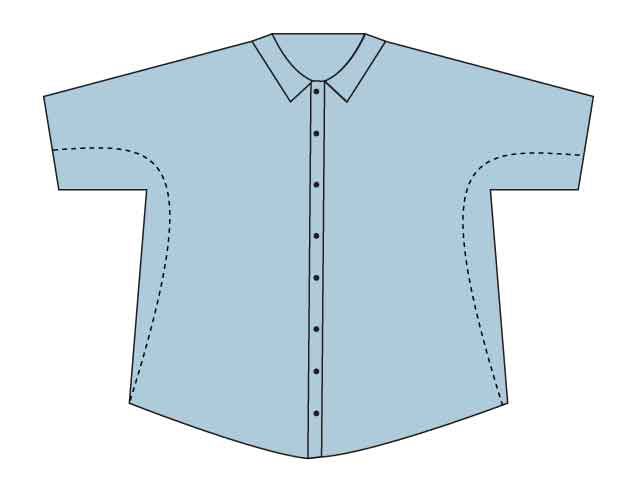
Try on your sweatshirt and pinch under the arm where you want the sleeve to stop. Trying it on will insure that your sleeve isn’t too tight when eyeballing it. Stick a pin where you want to sew and take off the sweatshirt. Cut from the armhole down the side seam, taking in just a few inches under the arm and an inch or two on the sides. Taper to the bottom of the sweatshirt. You want to keep some fullness to allow belly space, but also contour it so you don’t look like you’re wearing oversized clothing.

Use the second sweatshirt’s sleeve to cut out the bell ruffle. Use the top of the sleeve crease as your fold.

Use the other sleeve for a second ruffle. Sew the raw edges together using a baste stitch, 1/2″ from the raw edges. Repeat 1/4″ from raw edges so you have two lines of basting stitches.

Open up the sweatshirt over the shoulder seam and flatter out on a table. Pull the baste stitches on the ruffle until they match up with the shoulder edge. Pin the ruffle to the shoulder on the right side with raw edges together. Baste to keep in place.

Turn what you have of the sleeve inside out. Trim from 1/2″ above the cuff up to the top of the sleeve. You want the top edge of the sleeve to match up with the shoulder edge since they are going together!

Sandwich the top of the sleeve over the ruffle and sew it on. The right side will be DOWN.

To finish the top, we just need to sew the side seams and then attach the waistband.

Lay the sweatshirt wrong sides out and match up the side seams. Sew from hem to cuff. Turn right side out.

Trim cuff so it isn’t as wide and sew the short edges together. Wrap waistband around the bottom hem with raw edges matching. Sew and press.

Done!

Filed Under: DIY, Mom Style, Pregnancy Tagged With: maternity

JOIN TO OUR MAILING LIST!

Leave us your email to receive new posts and special offers for members only! Don't miss a thing!

Nursery DIY: Skyline Mural with Youthful Nest

by Gugu Guru Leave a Comment

One of the most exciting parts of being pregnant is designing and curating the nursery for your baby, and Youthful Nest makes it unbelievably easy for parents to create the nursery of their dreams. Created and founded by designer, Lisa Janvrin, YouthfulNest is a new online interior design consulting firm which helps parents bridge the gap between their online design inspiration into real-life, well-designed rooms. Lisa’s blog is full of amazing nursery inspiration as well as D.I.Y tips for creating unique designs and items for your dream nursery – on a budget! Lisa is here today to show how easy it is to DIY a NYC Skyline Mural in your nursery. You can learn more about Youthful Nest here, and don’t forget to check out their newest crowdfunding campaign to make Youthful Nest even more accessible to all parents! 

Sky’s the limit when it comes to decorating a nursery no matter what the style. Our favorites are thoughtful elements that are either personalized or customizable so you can make them your own and compliment your design inspiration. One of the big design trends is painting an oversized graphic wall mural. Whether it is a mountainscape or cityscape, pick a placement and paint colors that are just right for your space. With the YouthfulNest DIY Skyline Mural kit you don’t have to freehand anything, rather choose from 10 building templates of various sizes and shapes. You also can recreate the mural with any color scheme desired from pastels to pop colors – whatever your vista requires. For a video tutorial check this DIY Skyline Mural, How-To Video.

The DIY Skyline Mural kit includes 10 individual paper stencil buildings. Each building stencil has basic instructions for application. You can use one or all of the buildings together to create the complete skyline. Basic Instructions: 1. Cut out building shape on dotted line; 2. Affix to wall with small pieces of painters tape; 3. With a pencil trace outline of building template; 4. Remove paper templates; 5. Place painters tape along the outline of the entire shape; 6. Paint with color of choice within the taped outline. Enjoy!

Filed Under: DIY, Nursery, Nursery Style Tagged With: decor, nursery

JOIN TO OUR MAILING LIST!

Leave us your email to receive new posts and special offers for members only! Don't miss a thing!

DIY Baby Hat Brim With See Kate Sew

by Gugu Guru 2 Comments

See Kate Sew partners with Gugu Guru once again to share a fantastic DIY tutorial.  This time? A lovely little baby hat brim hack for sunny days. Want to check out more DIY projects from Kate? Click over to see the full list – lots of fun summer project ideas! 

I’m excited to be back sharing a quick DIY baby hat brim hack with you today! I’m wearing a Tula mesh carrier and you can enter to win one below! This carrier is awesome, it’s easy to put on myself and has two buckles to secure it. You wear this wrap on your hips which distributes the weight perfectly and keeps baby nice and close! The mesh line is great for summer, it’s breathable and lightweight!

I love this basic grey one, but the Tula Carrier also comes in a bunch of cute prints! You can wear it on the front or back and holds larger toddlers, which is awesome!

Tula also makes blankets! Their wide variety of blankets are super soft and cute! I really don’t think you can ever have enough baby blankets.

Today’s DIY is a sunhat made from a bonnet that you can fold up for a little extra color. You’ll need a basic bonnet or bonnet pattern to start. You can use my pattern here or a premade bonnet!

Materials //

-free baby brim pattern

-1/4 cotton quilting fabric

-lightweight fusible interfacing

Instructions //

1. Cut out 2 brim pieces from cotton. Use a contrast fabric for one of them if you want an extra pop of color inside. Cut out 1 brim piece from fusible interfacing.

2. Fuse interfacing to the back of the brim lining fabric. Pin brim to the front of the bonnet, starting in the middle and winding around the front. Pin brim lining to bonnet lining and outer brim to outer bonnet.

3. Unfold both pieces and pin twill tape to the bottom front.

4. Pin both bonnet pieces together with right sides together (twill tape in between). Sew all the way around the hat and brim, leaving a 2-3″ opening at the bottom.

4. Turn right side out and press well. Topstitch over the opening to close the bonnet. And you’re done!

Check out some more fun DIY projects with Kate:

  • Our top favorite See Kate Sew baby projects
  • DIY Lunchbag tutorial
  • DIY Pacifier Clips
  • DIY Baby Hats
  • DIY Paint Splatter Bibs


Filed Under: Babywearing, DIY Tagged With: babywearing

JOIN TO OUR MAILING LIST!

Leave us your email to receive new posts and special offers for members only! Don't miss a thing!

See Kate Sew: Our Favorite DIY Baby Projects

by Gugu Guru Leave a Comment

We’ve been lucky enough to have the wonderful See Kate Sew share some exclusive DIY projects for baby and mama over the past year, and today we’re rounding up some of her favorite projects from her website – have you tried any of these?

We would love to hear!

Baby Blankets:

  • Do It Yourself Pom Pom Blankets
  • Flannel + Piping Baby Blanket
  • Extra Large Swaddling Blanket
  • Easy Fleece + Bias Tape Blanket
  • One Hour Modern Granny Square Quilt

Onesies: 

  • Vintage Camera Onesie
  • Vintage Lady Onesie
  • Applique Baby Onesies
  • Onesie Onesie (ha!)
  • Ruffles and Buttons Onesie
  • Floppy Tie Onesie
  • Hello World Onesie

Bibs + Burp Cloths:

  • DIY Fringe Bibs
  • Splatter Bibs
  • Burp Cloth Basic Tutorial 
  • Bucket o’ Burp Cloths (baby shower gift!)
  • Bandana Bibs
  • Biased Bibs

Baby Clothes + Accessories :

  • Ruffled Baby Dress
  • DIY Baby Hats
  • Silk Bow Headband
  • Double Bow Tie
  • Pleated Front Baby Dress
  • Faux Fur Vest
  • Shark Hoodie
  • Boho Baby Romper (we can’t with the cuteness)
  • Mermaid Gown Tutorial
  • DIY Teething Necklace (for mom)
  • Baby Headbands

Other Fun Projects:

  • Gender Reveal Pull Piñata
  • Toddler Game Project
  • DIY Lunch Bag
  • Ring Sling Tutorial
  • Pacifier Clips
  • DIY Yoga Mat

Filed Under: Baby Style, Budget, DIY, Economical Picks

JOIN TO OUR MAILING LIST!

Leave us your email to receive new posts and special offers for members only! Don't miss a thing!

Next Page »

Footer

Follow Us:

  • Facebook
  • Instagram
  • Pinterest
  • TikTok

COME AND GET IT!

Leave us your email to receive new posts and special offers for members only! Don't miss a thing!

· Midnight Theme

Copyright © 2025 · Guguguru, Corp. All Rights Reserved.